How to Use AMusicSoft YouTube Music Converter
Part 1. How to Register AMusicSoft YouTube Music Converter
Step 1. Download and Install AMusicSoft YouTube Music Converter
You can download the installation package from its product page or simply by clicking the download button provided here. AMusicSoft YouTube Music Converter is supported on Mac and Windows devices currently.
Step 2. Activate AMusicSoft YouTube Music Converter
For Free Trial Users: If you are using the free trial version, you can directly launch the program and explore its available features. With the free trial version, you can only convert 3 full songs from YouTube Music. To convert more tracks without any limitations, you will need to register and activate the full version of the software. (To buy the AMusicSoft license, you can navigate to the AMusicSoft Online Store. Free trial users can also contact our customer support team to learn about the latest promotions and special offers.)
For Paid Users: Click the profile icon in the bottom-left corner. Then choose "Log in with License". Enter the email address used to purchase the software and your registration code/license key. Click Sign in to complete the activation.
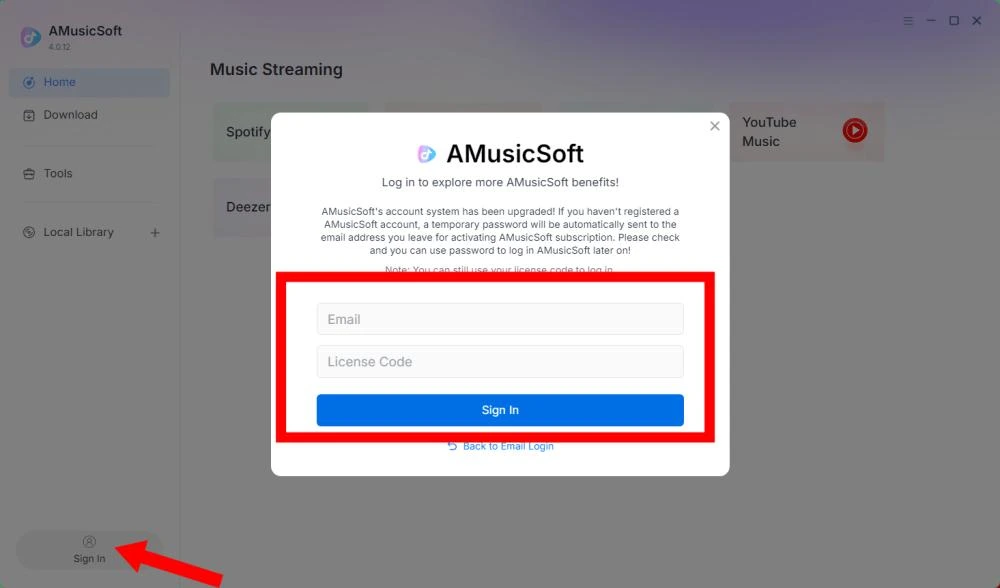
Note: Make sure you enter the same email address associated with your purchase and use the correct registration code. An active Internet connection may be required for verification.
Part 2. How to Convert YouTube Music to the Format You Like
Step 1. Select YouTube Music
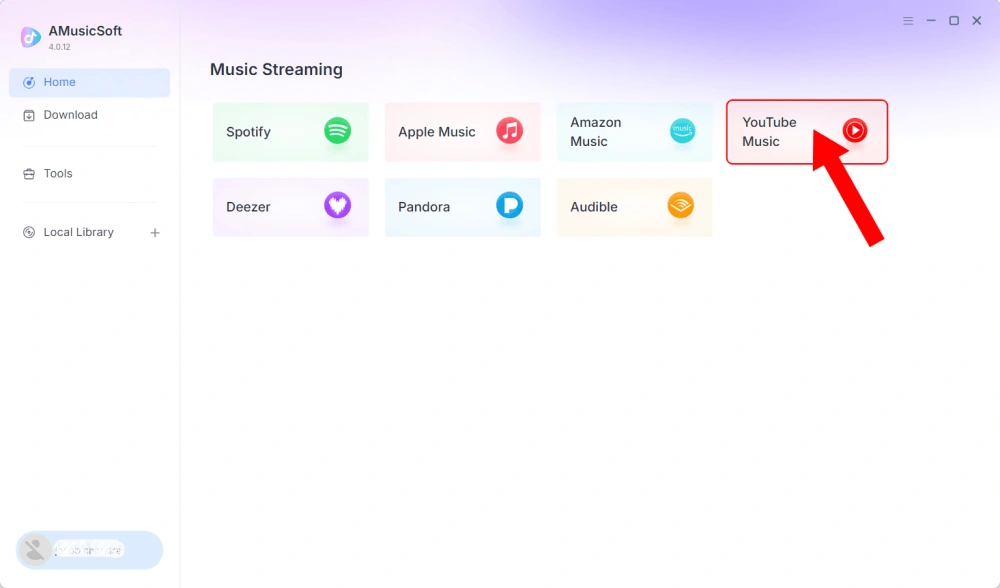
Launch AMusicSoft YouTube Music Converter. On the main interface, select YouTube Music.
Step 2. Log in to YouTube Music
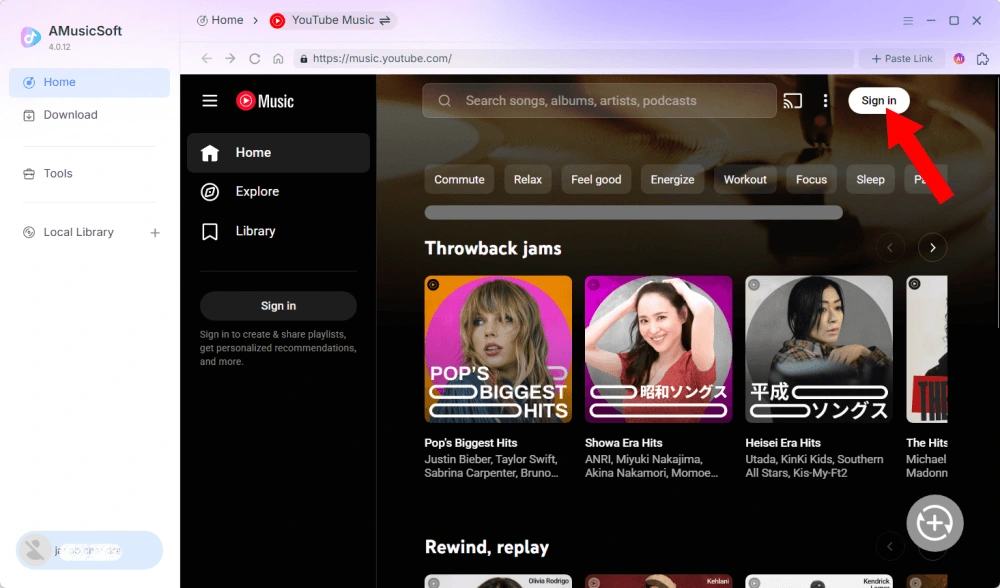
AMusicSoft YouTube Music Converter integrates the official web players of supported music platforms. After selecting YouTube Music, sign in with your YouTube Music account to search for and download music.
Step 3. Add Music to the Program
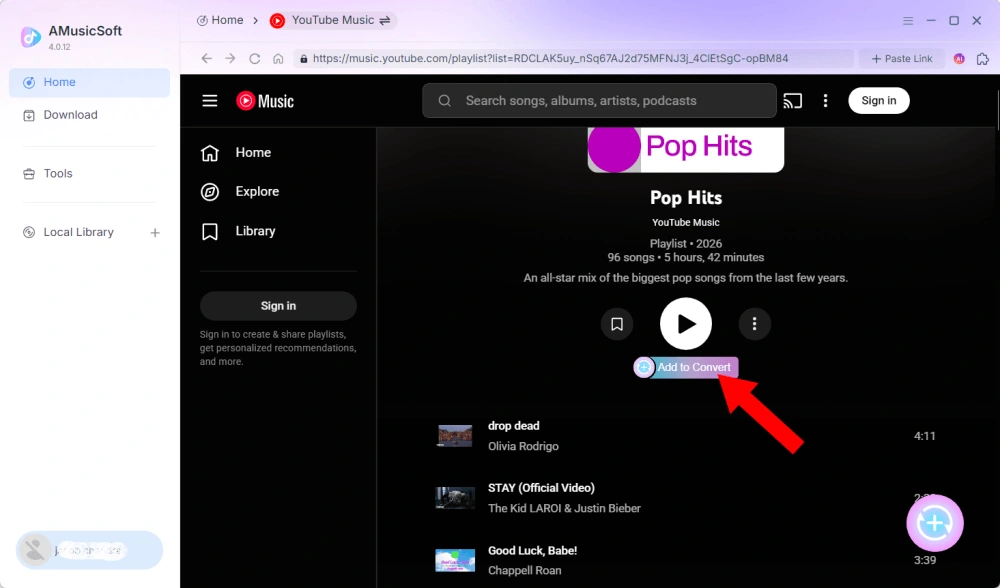
After logging in, browse your music library and select the songs, playlists, albums, or podcasts you want. Click "Add to Convert" next to a track or playlist to add it to the conversion list, or drag and drop the music onto the floating "+" icon.
Content Availability: The availability of any song or album depends entirely on the subscription status and regional permissions of the account you use.
Step 4. Select the Output Format and Customize Output Settings
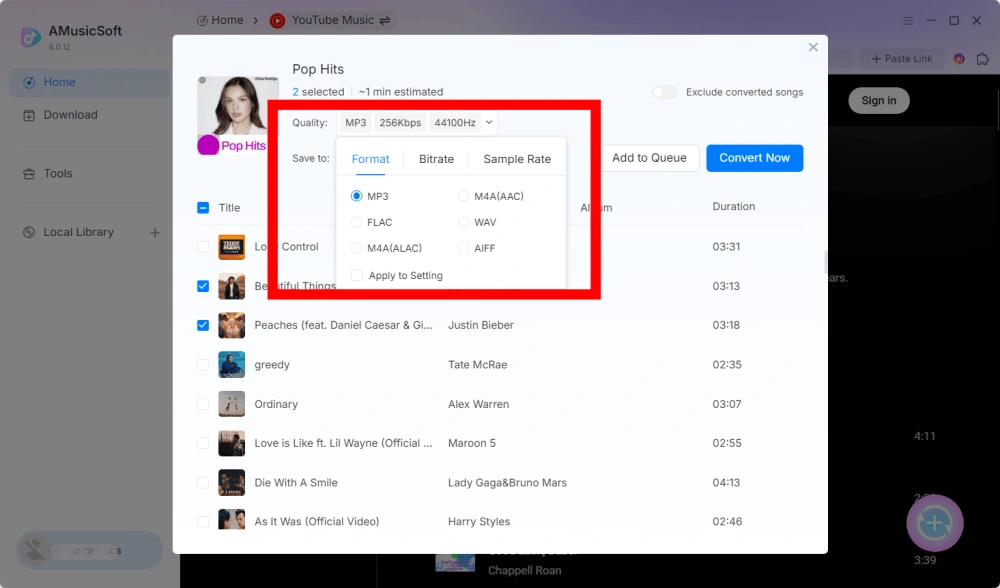
After adding your music, open the Output Format menu to choose your preferred format. AMusicSoft YouTube Music Converter also allows you to adjust available output parameters according to your needs, such as Bit rate, Sample rate, or others. Finally, click the output path or folder selection option and choose where you want the files to be saved. If you are not familiar with these settings, you can keep the default configuration for a simpler conversion process.
Step 5. Start Converting Music
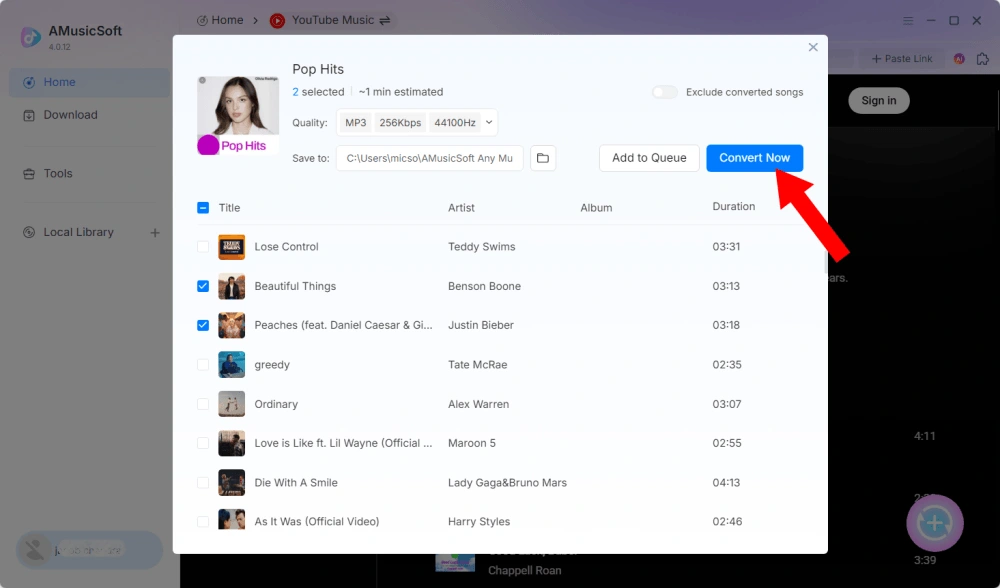
Once all settings are configured, review your conversion list and click the Convert button. The software will begin processing the selected music files. The progress information allows you to monitor the conversion status. For batch conversions, you can add multiple songs and process them together rather than converting each file individually.
Step 6. Find the Converted Music
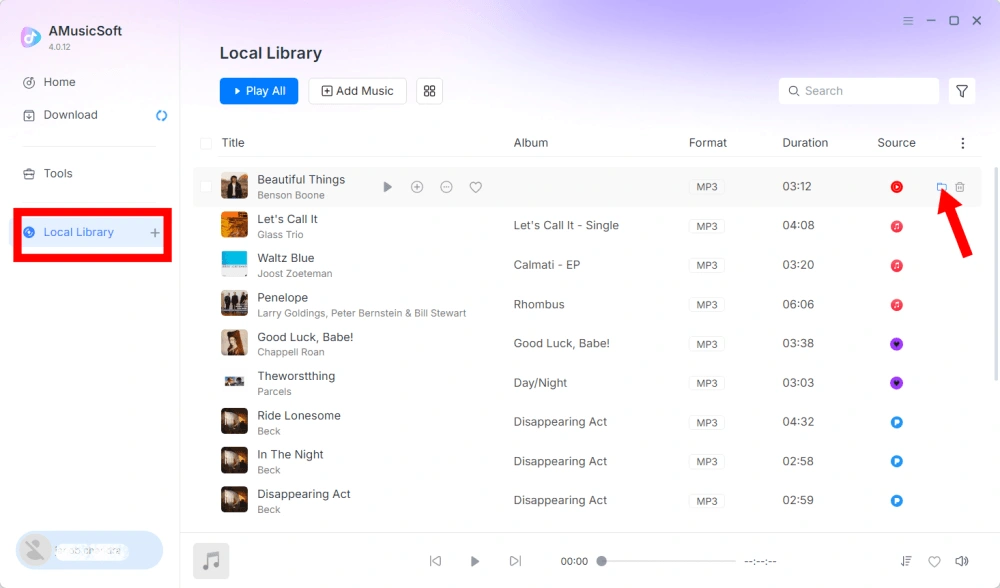
When the conversion is complete, open the selected output folder to access your converted files. You can then transfer the files to compatible devices, organize them in your local music library, or play them with supported media players.
Part 3. What Should I Do if I Can't Download Music?
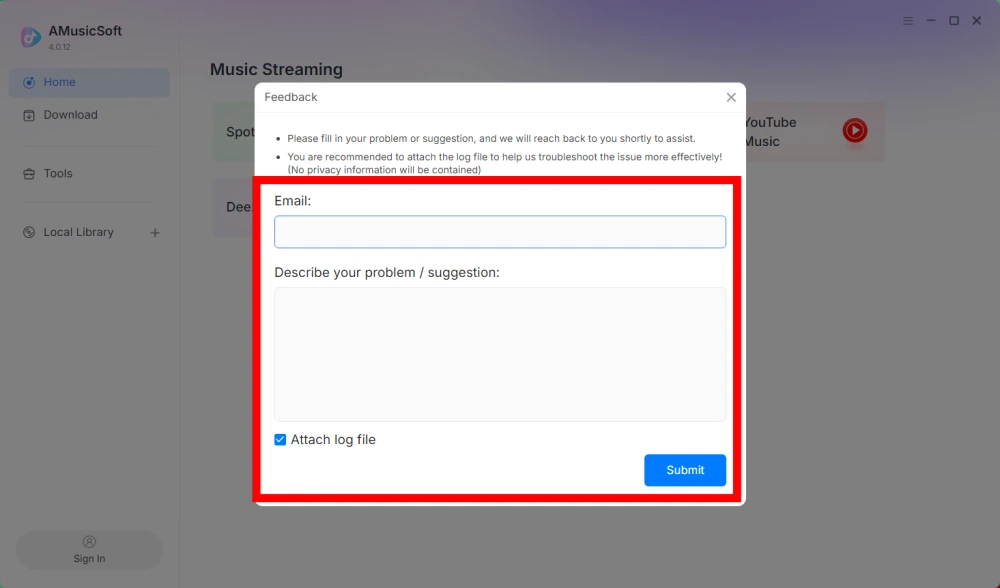
If you encounter an issue while downloading or converting music, please submit the software log and a screenshot of the error to our support team. This information will help us identify the problem and provide a solution more quickly.
- Click the menu in the top right of the program and choose "Send feedback."
- Describe your issue and write down your license key in the text box.
- Finally, please check the "Attach the log file" box before submitting.
Part 4. How to Preset Output Settings and Audio Parameters
AMusicSoft Any Music Converter lets you customize download settings and audio parameters to control the conversion process and output quality. You can adjust these settings directly from the conversion list before starting a conversion, or go to Menu > Preferences to preset your preferred parameters in advance.
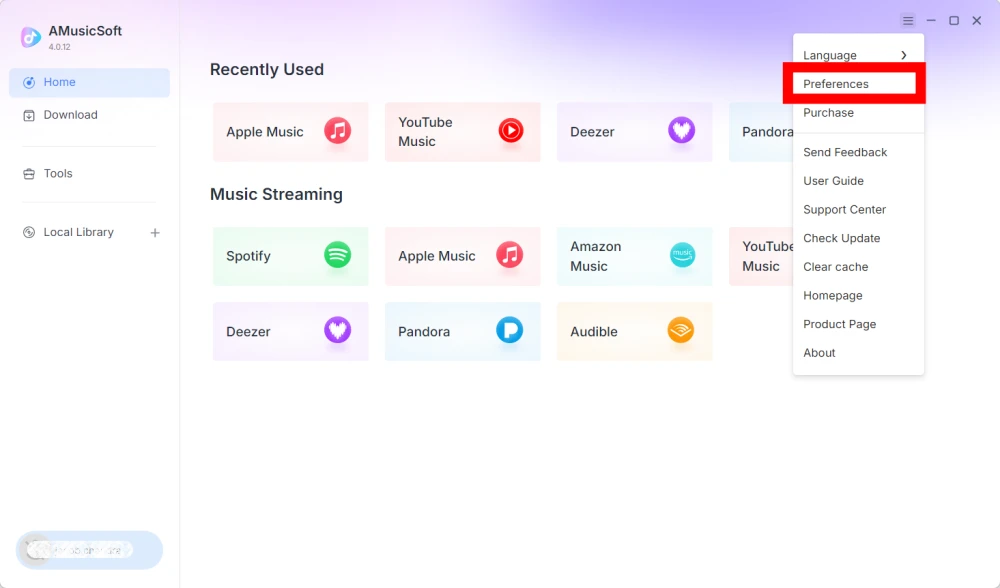
Language
Select your preferred language for the software interface.
General Settings
- Appearance - Customize the software interface appearance.
- Output Folder - Select the folder for saving converted files.
- Auto-naming Pattern - Customize the file naming format.
- Archive By - Choose how to organize downloaded music.
- After Conversion - Choose what happens after the conversion is complete.
- Save Music - Enable or disable saving converted music files.
- Lyrics - Enable or disable saving lyrics with the music.
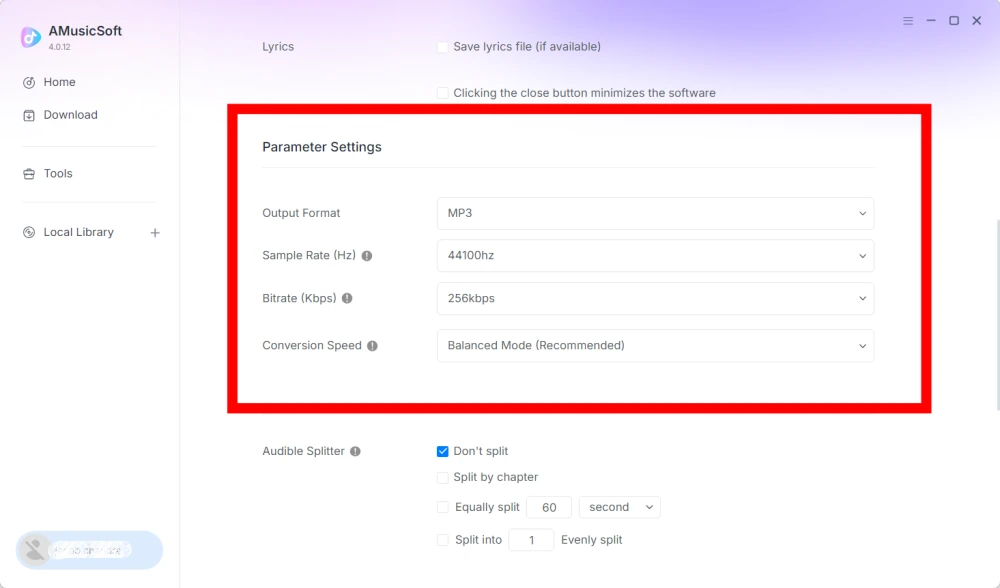
Parameter Settings
- Output Format - Select the desired audio output format.
- Sample Rate (Hz) - Set the audio sample rate. (Range from 22050hz to 48000hz.)
- Bitrate (Kbps) - Set the audio bitrate to control output quality. (Range from 128Kbps to 320Kbps.)
- Conversion Speed - Adjust the conversion speed according to your needs.
- Audible Splitter - Split Audible audiobooks into smaller sections.
Playback Settings
Crossfade Songs - Enable a smooth transition between songs during playback.
Network Settings
- Simultaneous Downloads - Set the number of music files to download simultaneously.
- Proxy - Configure proxy settings for network connections.
Other Settings
Pop-ups - Enable or disable pop-up notifications.
Part 5. How to Manage Your AMusicSoft Account
You can manage your AMusicSoft account and subscription information from the account center.
View Unlocked Services
Click the profile icon in the bottom-left corner. Then you can check the services and features currently unlocked with your account.
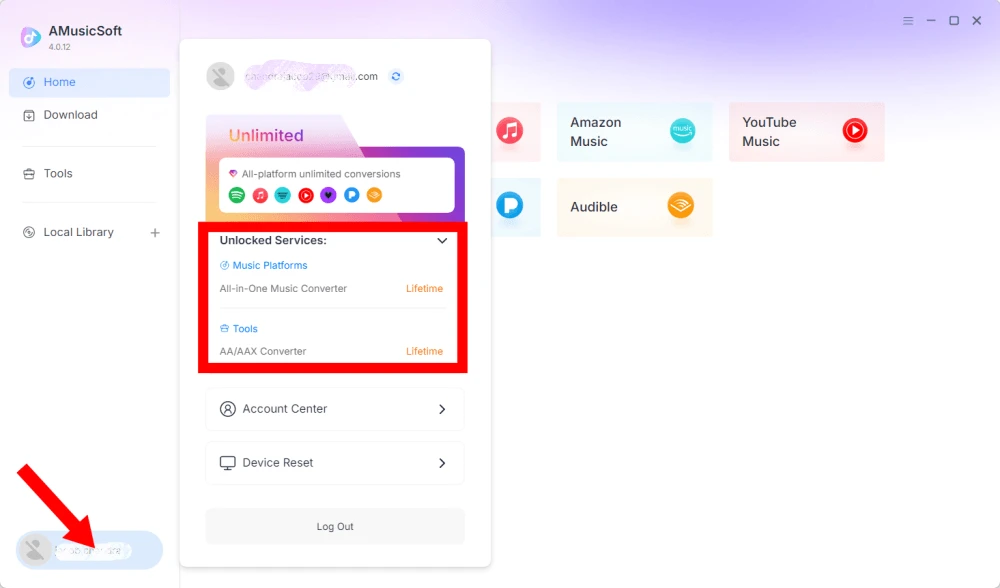
Access Account Center
Click the profile icon > "Account Center" to get into the AMusicSoft Account Center, where you can manage your account and related information.
- Personal information - Update your username and click "edit" to change your avatar photo. (Use the Delete Account button in the bottom-right corner with caution. Once your account is deleted, the account and associated license key will be immediately deactivated. Make sure you have no active subscription before proceeding.)
- Subscription - View and manage your current subscriptions. If you want to cancel a subscription, just click "Manage subscription" to pause it. If you are unable to cancel, please contact customer service ([email protected]).
- Manage devices - If you are switching to another device and want to use AMusicSoft on the new device, you can easily complete the task. If you are unable to reset, please contact customer service.
- Billing - All the order details can be found. If you are unable to check the bill, please contact customer service.
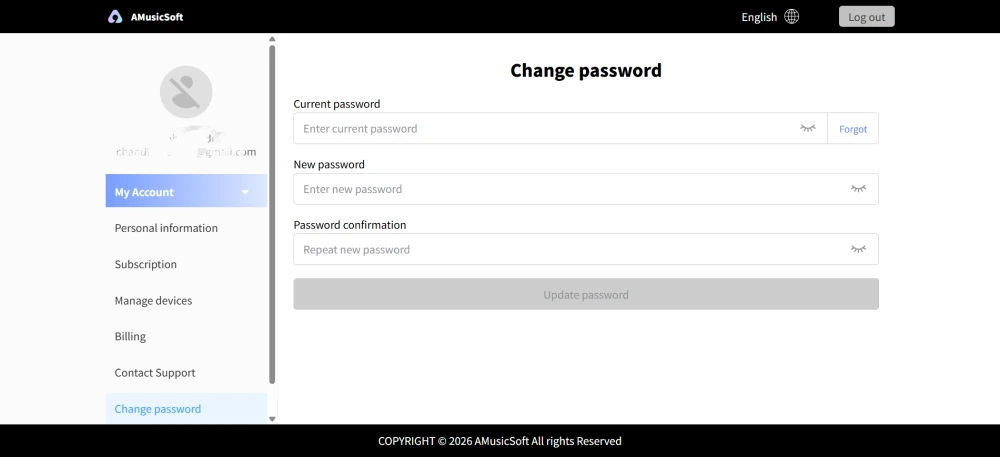
- Change password - Set the new password you like. If you forgot your current password, click "Forgot". Follow the on-screen instructions to reset your password.
Part 6. FAQ
-
AMusicSoft's subscriptions do not include any streaming service subscriptions. To access and convert music tracks, users must have their own streaming service accounts first. The availability of any song, playlist, or album depends entirely on the subscription status and regional permissions of the streaming account you use.
Subscription-Based Streaming Services (e.g., Apple Music): You must have an active subscription linked to your account to access and convert content from premium streaming platforms.
Free-Tier Services: For streaming services that offer free access (e.g., Spotify), you can use a free account to access and convert available music tracks. -
Yes. You can preset the output format, sample rate, bitrate, and other audio parameters under Menu > Preferences.
-
By default, converted files are saved in the designated output folder. You can change the location under General Settings > Output Folder.
-
Yes. Go to Network Settings > Simultaneous Downloads to adjust the number of concurrent downloads.