iTunes Export To WAV – The Ultimate Guide
There are several reasons why it is important to know about iTunes export to WAV. Converting the original format into another, which is WAV, might be causing you to wonder if there is really a need to exert time and effort to get through this process when you can still stream the tracks even if they are encoded in their original format.
Actually, music files come in compressed and uncompressed formats. Sometimes, the format of files can cause an issue if they are to be played in other devices. This is when the importance of converting files into accessible formats such as WAV should be appreciated. Fortunately, the conversion of files can simply be done within the Apple Music app itself. Although this is a lot easier, some users are surely not aware that these kinds of procedures are possible in Apple Music.
In this post, I will show you how the process of iTunes export to WAV works. You will know as well the best alternative to still proceed with the conversion process even if you do not have iTunes app on your computer.
Contents Guide Part 1. How to Convert iTunes Songs to WAV Using iTunesPart 2. How to Convert iTunes Music to WAV Without iTunesPart 3. Conclusion
Part 1. How to Convert iTunes Songs to WAV Using iTunes
Since we are to focus on using computers or Windows, let us tackle about the process to follow in relation to iTunes export to WAV. Check out the enumerated steps below.
Step 1: Modify iTunes Settings to WAV Encoder
- Make sure that you already have an iTunes application on your device.
- After installation, launch it and then tap the Edit tab from the menu bar above.
- From the submenu shown, choose the Preferences option. Upon doing so, the General Preferences window will show up.
- In the window that has opened, select the General tab and then click the Import Settings button at the bottom part of the window that has showed up.
- After clicking on this button, you will be able to see all the output formats that are available in iTunes for conversion. Next to Import Using option, tap the downward arrow in order to see the set of formats. From here, click the WAV Encoder option.
- Once selected, do not forget to click the OK button at the bottom of the window.

Step 2: Add the Music Files to iTunes
To continue with the process of iTunes export to WAV, start uploading the files to iTunes. For this process, you have two options to choose from. Just follow whichever is more convenient and faster for you.
Option 1: Through Drag and Drop Method
This method is actually more recommended to use since it is easier. You just have to create a playlist in advance so that dragging them from your library to iTunes will be faster.
Option 2: Import Files Through Series of Steps
- Select the File tab at the upper left corner of iTunes interface.
- Then click the option of “Add File to Library”.
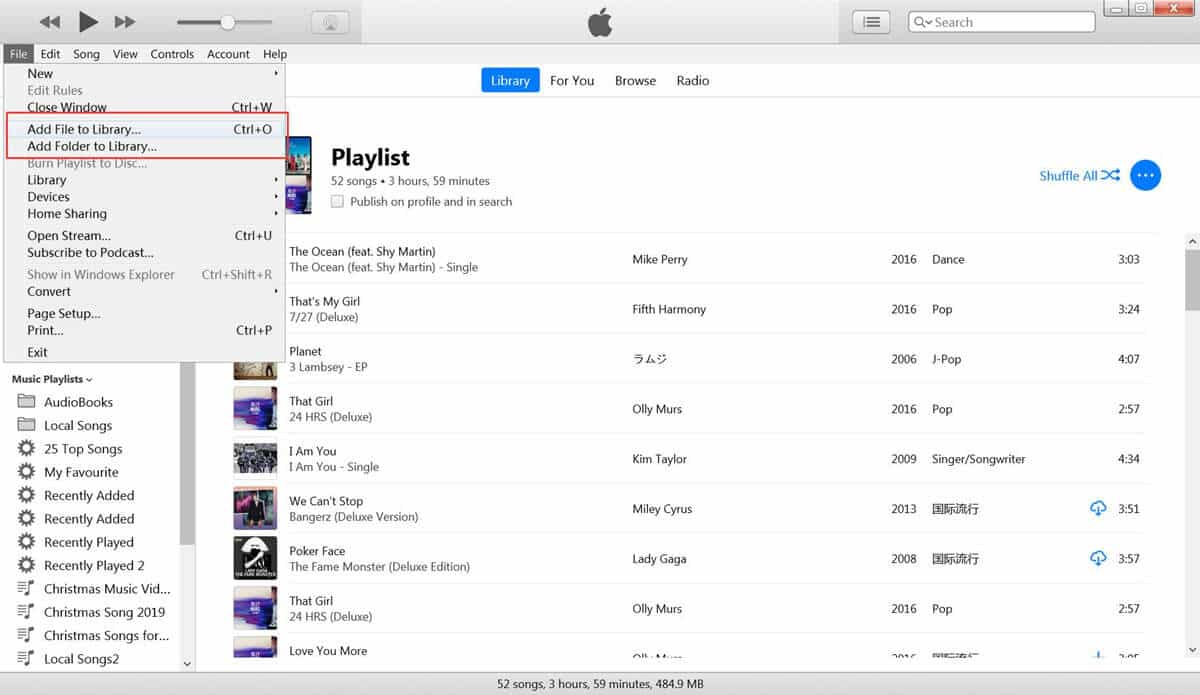
- After doing so, you will be directed to your library to start the selection of songs. You may select them individually or by batch.
- To proceed adding them, tap the Open button below.
Step 3: Convert iTunes to WAV
- Since you already had every track uploaded in iTunes, all you have to do now is to officially start the “iTunes export to WAV” procedure by tapping the File tab at the upper left corner.
- Follow this with the selection of the Convert option.
- Then from the submenu shown next, select Create WAV version.
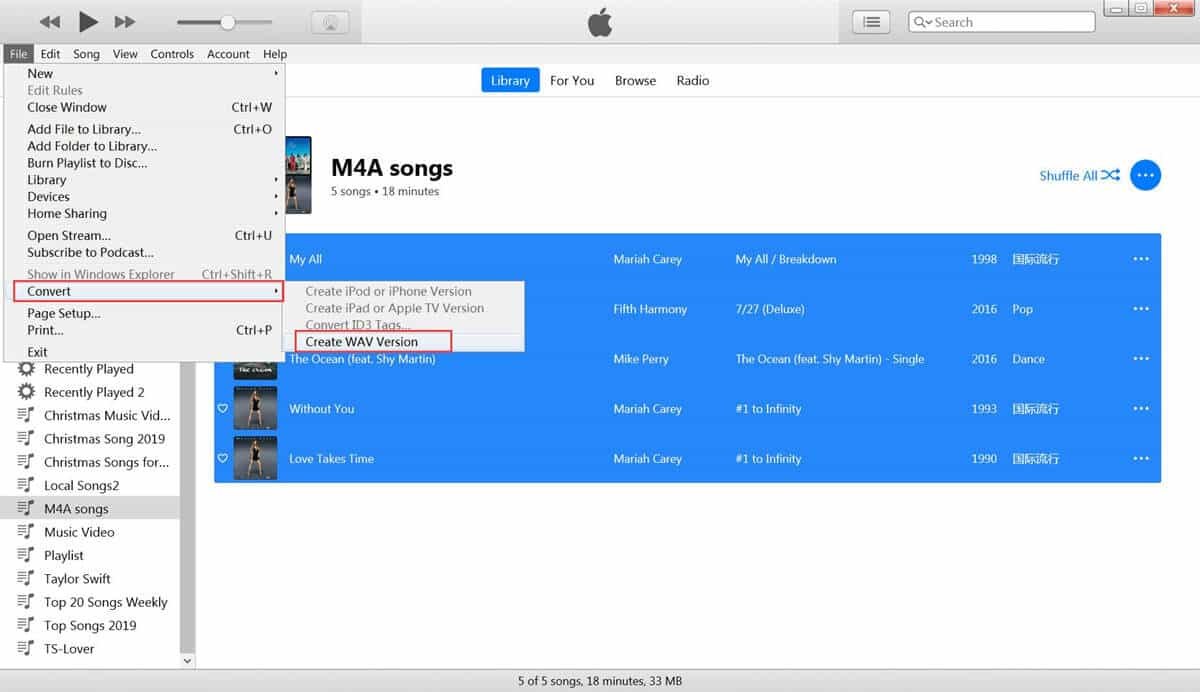
After doing that, the changes in the settings made will be applied to all incoming M4A files.
Part 2. How to Convert iTunes Music to WAV Without iTunes
If unfortunately, you are not utilizing the iTunes application in streaming music, is it possible to proceed with “iTunes export to WAV” process? Sometimes you will find music on the iTunes library that has DRM protection. This encryption makes it hard to export your songs from iTunes or transfer files to other devices.
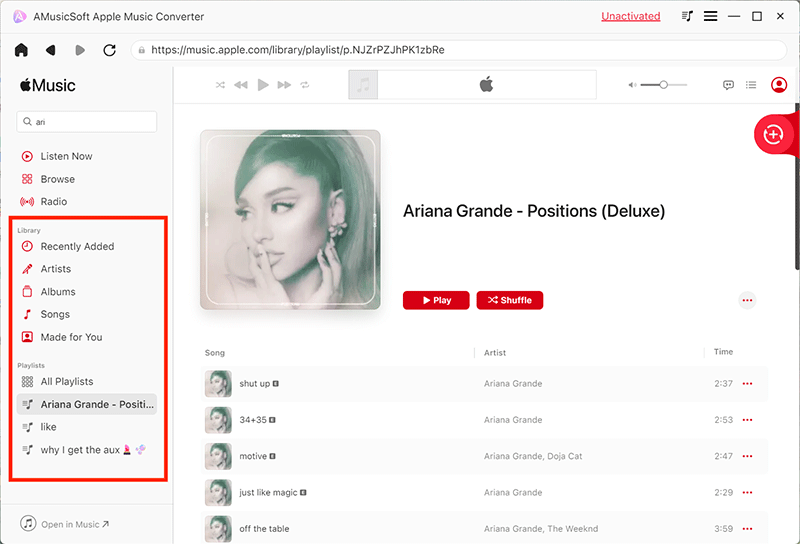
Honestly, there is still a way on how to do this process and that is through using AMusicSoft Apple Music Converter. When it comes to features, this tool definitely has it all. First, it can convert the songs into accessible and popular formats; second, it can download the resulting files and can help you in securing a permanent copy; it even has a 16x faster working speed that can finish all the processes involved within just a few minutes; it can effortlessly produce good-quality results and lastly, it is very easy to use.
AMusicSoft Apple Music Converter is very reliable to use. Once you already have the files saved as local documents on your device, transferring them from one music player to another won’t be that much problem to you. This is because all the formats that you can get from this tool are supported in almost all devices. Naming these formats, you can choose from FLAC, WAV, AAC, MP3, AC3 and M4A. You can use these converted songs for free if you want to customize a ringtone from Apple Music with your favorite songs.
Follow the steps below.
- Go to the AMusicSoft website and click the Download button under Apple Music Converter.
- Install the application right after and then launch it to start adding the files. To do that, just mark the box before each song title you want to convert.
- Select the format to use and then allot an end folder to save the files.
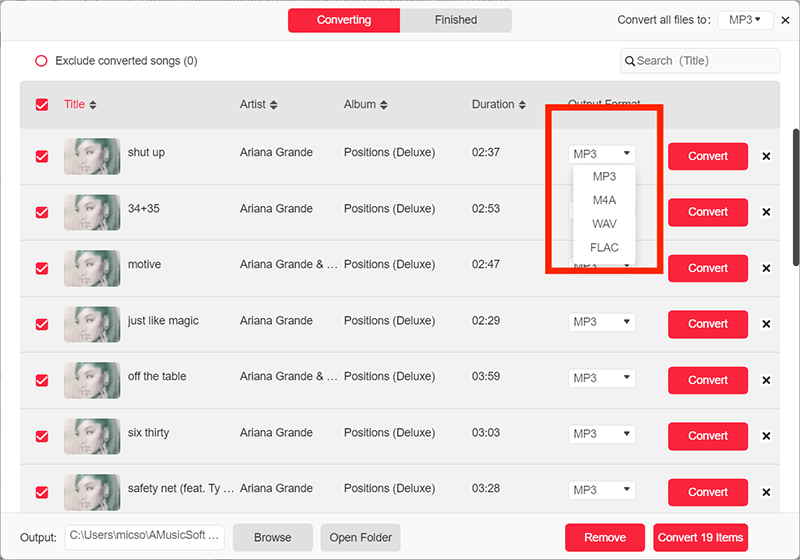
- Tap the Convert button next.

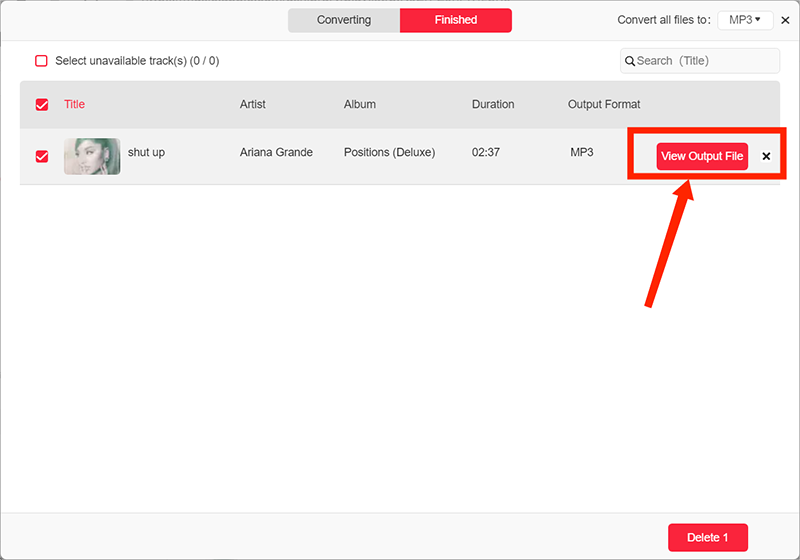
- Save the resulting files by getting them from the Finished menu at the top of the individual tracks.
Part 3. Conclusion
For the process of iTunes export to WAV to be possible, you only have to do a certain set of steps that are all easy to follow. You just have to make use of the iTunes application properly. On the other hand, if you do not have the application, you can just use AMusicSoft Apple Music Converter to convert the songs and download them into accessible formats such as WAV. In this way, you can have them streamed on any music player of your choice without limit.
People Also Read
- How To Set A Ringtone From Apple Music Without iTunes
- Learn How To Keep Apple Music Playing In Background
- Apple Music DRM Removal: Is It Illegal?
- Guide On How To Turn On/Turn Off iCloud Music Library
- How To Change a Music File Type
- How Do I Get To Play Apple Music On Music Player Windows XP
- What Is M4p File: All The Things That We Need To Know
- Best Ways To Transfer An iTunes Playlist To Another Computer
 About The Author
Robert Fabry is an ardent blogger, and an enthusiast who is keen about technology, and maybe he can contaminate you by sharing some tips. He also has a passion for music and has written for AMusicSoft on these subjects.