Multiple Ways On How To Change Your Apple Music Plan
Apple Music service is originally released to be subscription-based. In here, you can choose between Student, Individual and Family plan. Of course, each plan will have a corresponding amount for subscription, so, you have to decide wisely and know which plan would be the most affordable for you. When it comes to features, all will have the same.
If you have a specific reason why you’d wish to switch your plans, I’ll share with you below the ways on how to change your Apple Music plan regardless of which plan you currently have.
Contents Guide Part 1. How to Switch from Individual Plan to Family Plan?Part 2. How to Switch from Family Plan to Individual Plan?Part 3. How to Switch from Individual to Student Plan?Part 4. Bonus: Download Songs from Apple Music Without Any PlanPart 5. Summary
Part 1. How to Switch from Individual Plan to Family Plan?
Apple Music is currently available on iOS, Android, Mac, and PC as well as other devices such as Samsung’s smart TVs. To use Apple Music service, you need to subscribe to it first. Apple won't offer free tier but there is a free trail for newers. Apple Music Individual plan costs $10.99 per month to allow users access to the entire content library and many perks, including Siri compatibility, offline listening, Spatial Audio and more.
How much all your family cost in Apple Music if they pay the Individual plan? If your family over 5 to 6 members, it should cost $66 a month at least! Is there any way to save money on music streaming? Don'y worry, Apple Music also has a Family Plan, one that gives six people ad-free, on-demand music listening for $16.99 per month.
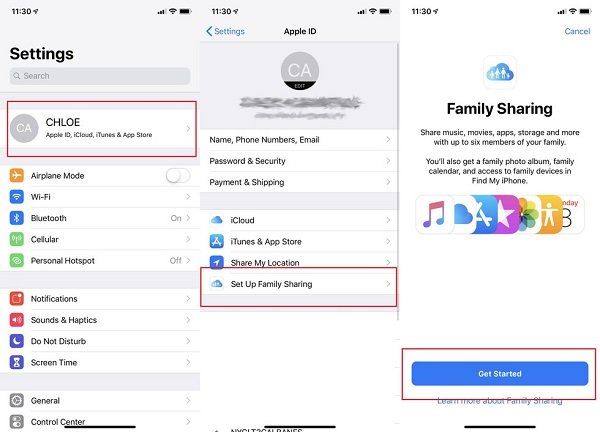
So we recommend that switching to Family Plan for you and your family members. How to change your Apple Music plan to Family Plan? Before you can even start, you have to make sure first that Family Sharing have been createed in advance. For reference, just head to the Settings app and then choose iCloud button. Select Set Up Family Sharing then.
Once you do that, follow the steps below to switch from an individual Apple Music plan to a Family Plan.
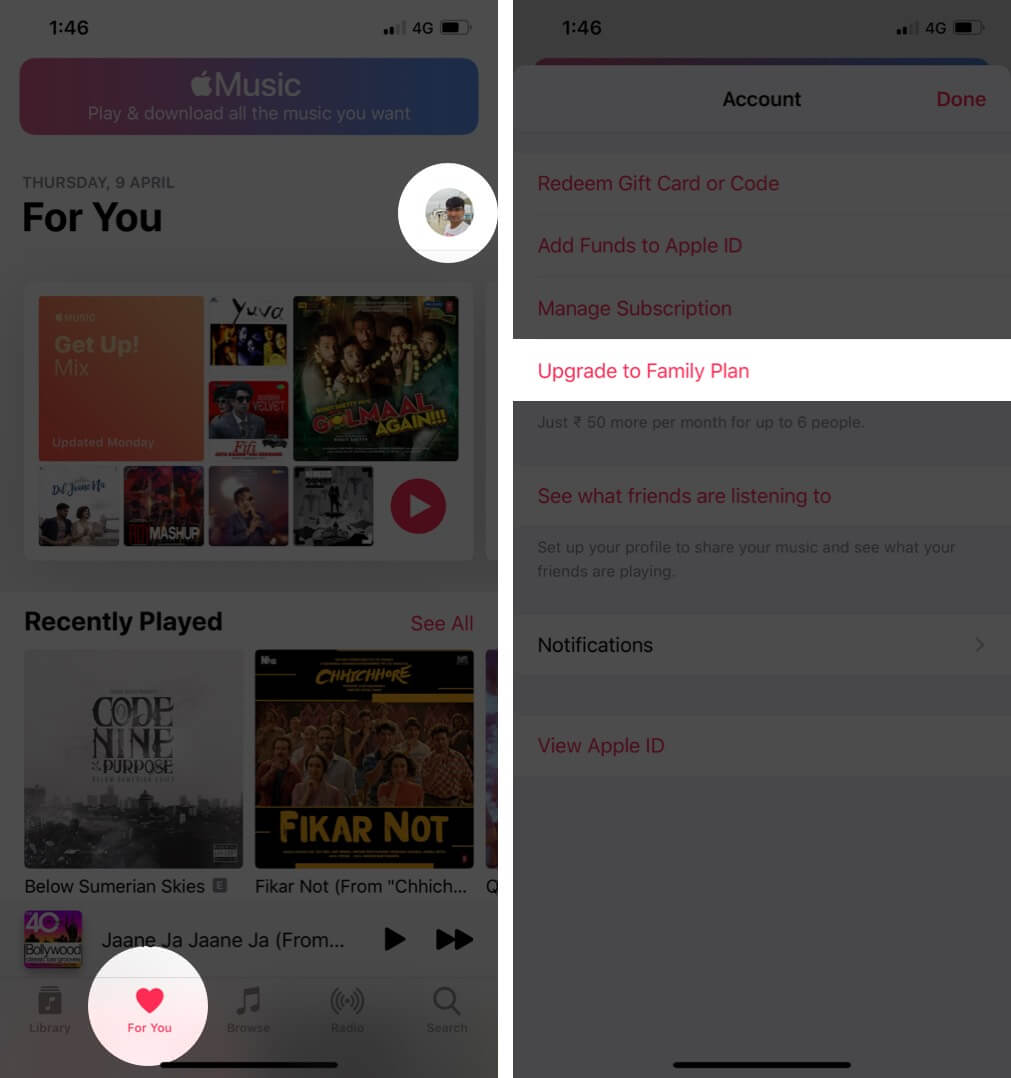
- Start with launching your installed Apple Music app.
- From the welcome screen, select the For You tab among the tabs in the navigation bar at the bottom.
- Placed at the top right part of your screen is your Account icon which needs to be selected next.
- After doing so, tap on Upgrade to Family Plan.
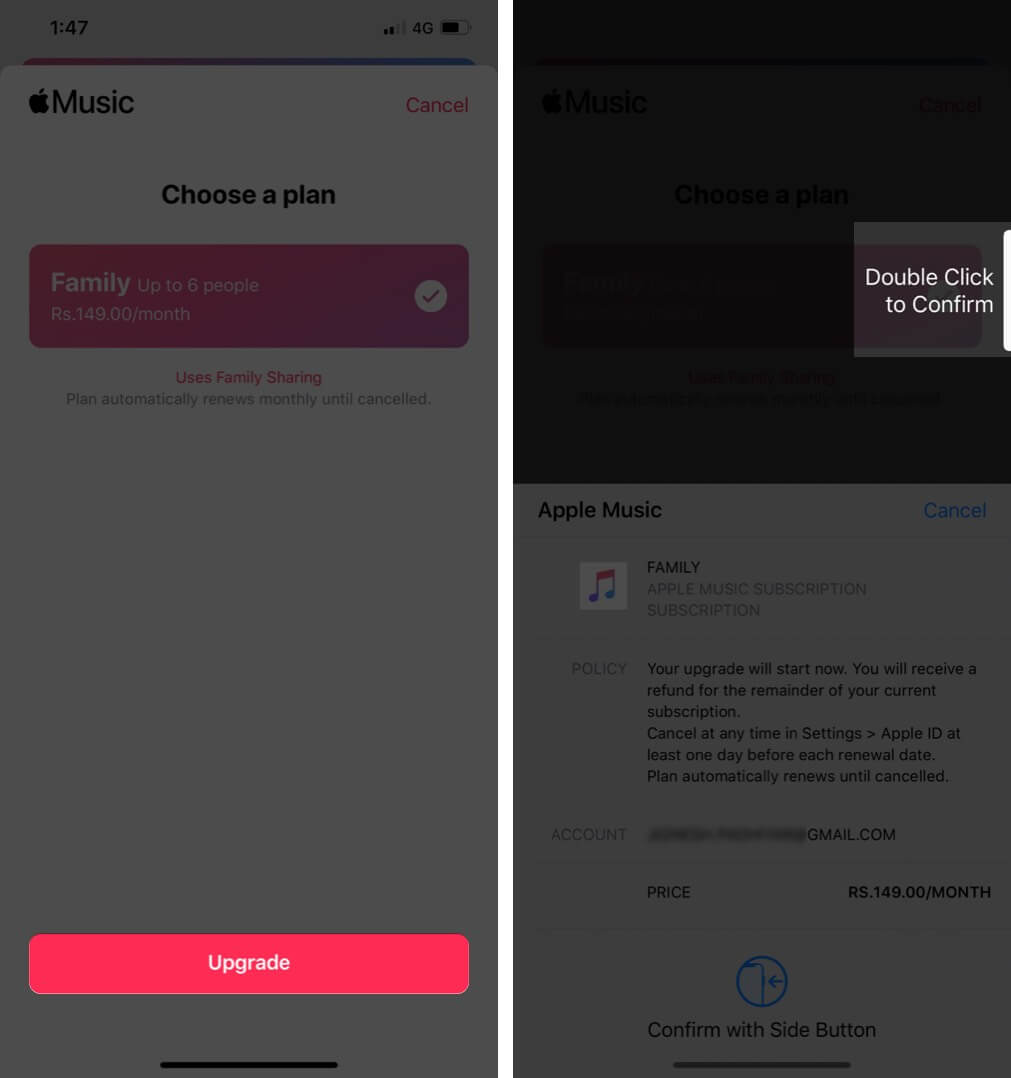
- Hit Upgrade and finally, confirm your newly chosen subscription. Make sure to provide all the needed details in order to proceed with the successful set-up of your new plan.
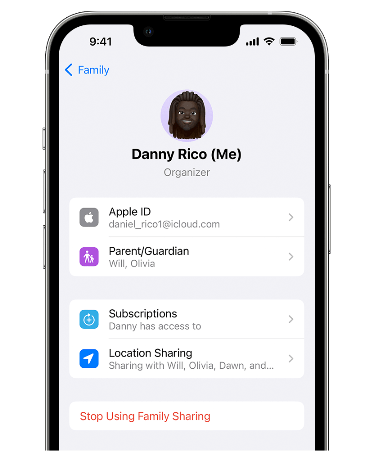
Apple Music doesn’t require Family plan subscribers to reside at the same address. As long as they’re using the same iTunes Store region, they can avail of the same Family plan.
Part 2. How to Switch from Family Plan to Individual Plan?
The procedure discussed earlier can actually be done and vice versa, so, in relation to that, here is how to change your Apple Music plan to an Individual plan.
- On your iPhone, iPad, or iPod touch.
- Go to Settings > Family. If you don't see Family, tap your name, then tap Family Sharing.
- Tap your name > Stop Using Family Sharing.
- After doing so, launch the Apple Music app and start choosing your desired plan.
If you suddenly had the heart to get your own separate account, there is no need for feeling guilty as the entire Family account won’t dissolve if you leave and will still keep on working.
Part 3. How to Switch from Individual to Student Plan?
For most college students, there is no need to worry as there are also available plans for you. The students who are validated using UNiDAYS only pay 50 percent less for their monthly Apple Music subscription. Students can take advantage of the discount for up to four years. In the below guide, you will learn about how to change your Apple Music plan from Individual to Student.
- Again, launch the Music app and navigate to the For You tab.
- Go to Account window again and then choose the Upgrade button.
- Click the Manage Subscription option and then hit Student plan. Take note that you might be asked for some more details to verify your student identity. Just make sure to provide the authentic and needed details in order to proceed.
Part 4. Bonus: Download Songs from Apple Music Without Any Plan
The sections above have taught you how to change your Apple Music plan. This time, you will learn about the most reliable way to download your favorites from the Apple Music service without monthly subscription or Apple Music yearly subscription.
You are surely aware already that the files that you see from Apple Music are all protected with DRM. Meaning to say, downloading wouldn’t be easy as they need to be unprotected first. So, you must use a professional music converter and downloader to make it possible. This is actually just simple and easy for AMusicSoft Apple Music Converter. Since it is designed for Apple Music DRM removal, it can quickly finish conversion and download procedures. It even has a 16x faster working speed that can finish all processes within just a few minutes. The quality of the resulting songs is also of the best quality and no difference, between the original and the new one, will be noticed at all.
It even has a simple user guide that everyone can quickly follow. What makes this tool one of the best is about the output formats that it can produce at the end of the process. It can give you the formats of MP3, FLAC, WAV, AAC, AC3 and M4A. All of these formats can be played without problem on any music player around.
Let us see below the complete steps on how to download Apple Music files using the tool of AMusicSoft.
- On your computer, tap the browser icon and then search for the website of AMusicSoft. From here, you can download the Apple Music Converter application by simply hitting the Download button. Proceed with installing it right after.
- Right before each song title, you’ll find a mini selection box which you could mark to indicate that they have been selected. Just browse your list and choose whichever you want.

- From the mentioned formats available, choose one format you mostly desire to have and then follow it with the output folder.

- Click the Convert button to begin with the main process.

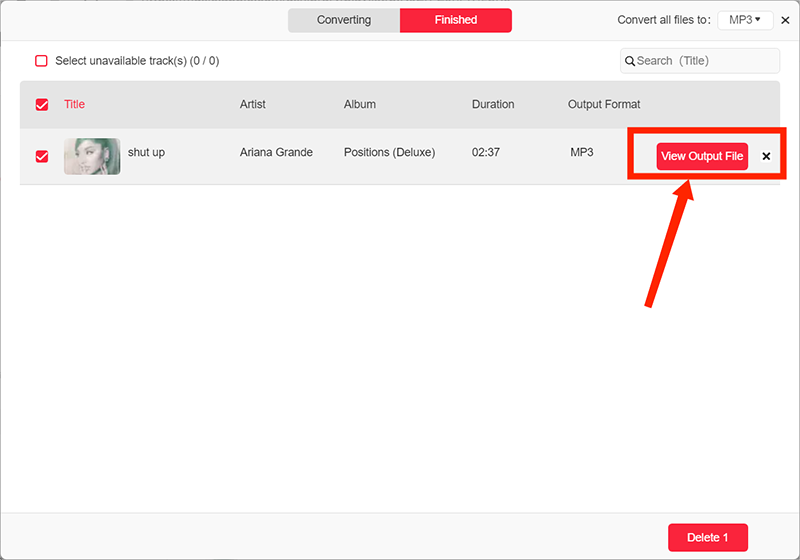
- Finally, save the results by getting them from the Converted menu.
Part 5. Summary
Based on the discussion above, it is clearly possible for everyone to finish the process on how to change your Apple Music plan in just a couple of minutes. But of course, make sure to know in advance all the features offered in the plan that you are about to switched into. Once done checking, then you’re good to go. On the other hand, you can download all of the playlists and tracks that you want by using AMusicSoft Apple Music Converter. By simply following the guide shared above, you can have the results in just a short time.
People Also Read
- Why Apple Music Deleted Songs And How To Recover?
- Best Music Player For iPhone With Equalizer
- Simple Tips On How To Put An MP3 Into iTunes
- Best CD Ripping Software To Copy CD Music To PC
- “Does Google Home Work With iTunes” – Yes Or No?
- Best Tips To Fix Apple Music Not Working On CarPlay
- How To Copy iTunes Library To External Drive For Backup
- The Best Justin Bieber Songs That You Must Stream
 About The Author
Robert Fabry is an ardent blogger, and an enthusiast who is keen about technology, and maybe he can contaminate you by sharing some tips. He also has a passion for music and has written for AMusicSoft on these subjects.