How To Turn Off Autoplay On Spotify For Mobile/Desktop
Spotify's autoplay feature is handy for those who love to have music playing indefinitely. It removes the process of thinking about what to play next. When an album or a playlist has come to its end, Spotify will autoplay songs that are much alike the songs that you previously listened to and it will never stop. But if you prefer to have control over what you hear, consider turning autoplay off for peace of mind. In this article, we will be talking about how to turn off Autoplay on Spotify.
Contents Guide Part 1. Turn off Spotify Autoplay on MobilePart 2. Turn off Spotify Autoplay on DesktopPart 3. How to Fix Autoplay Not Working on Spotify?Part 4. Bonus: Control Spotify Music Playback Fully Without PremiumPart 5. To Summarize It All
Part 1. Turn off Spotify Autoplay on Mobile
How to turn off Autoplay on Spotify? The Spotify mobile app is the primary way through which most people listen to music. So, in this part, we will walk you through how to disable Autoplay on the Spotify mobile app first, follow these steps:
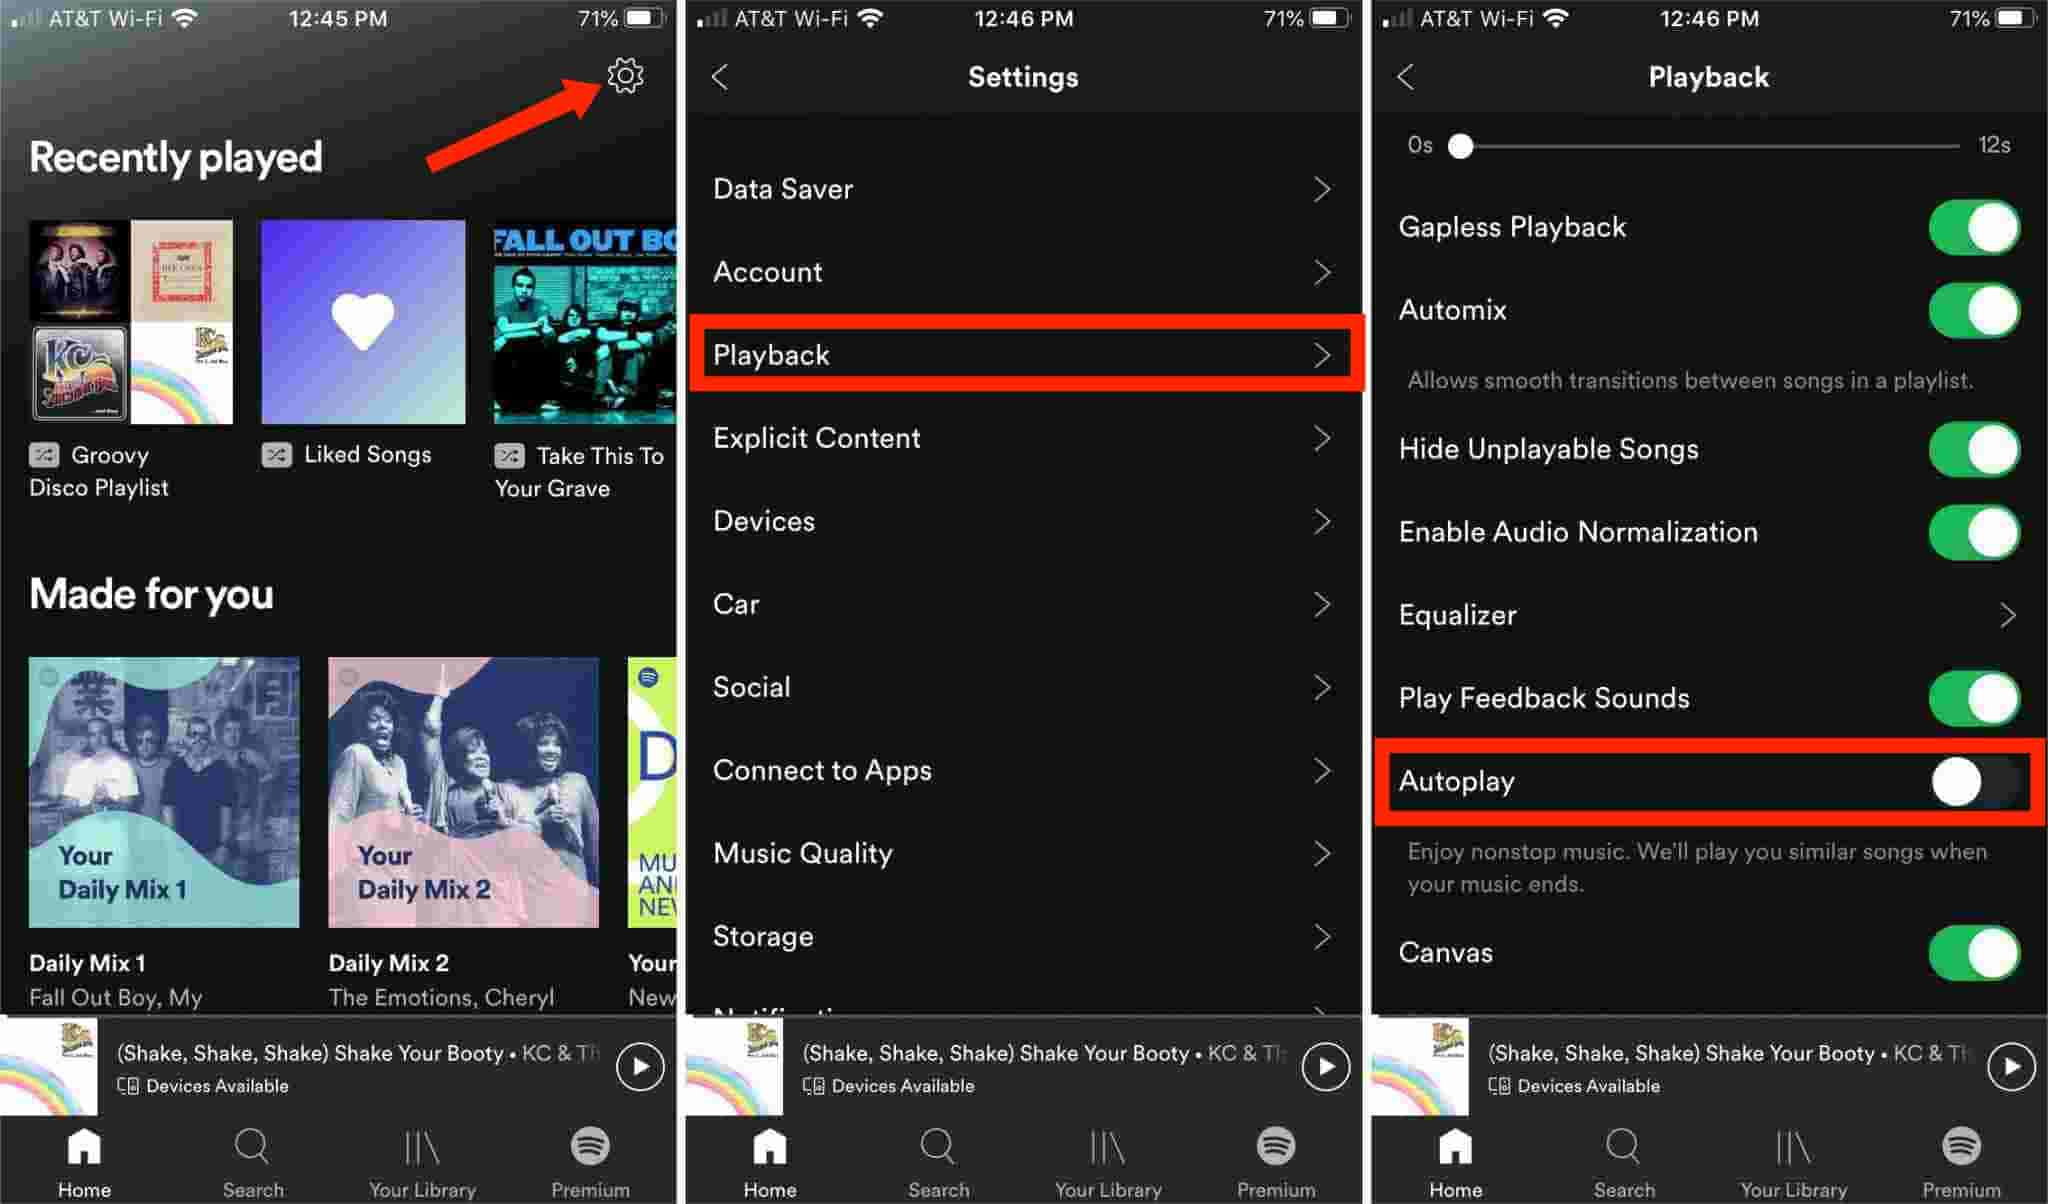
Step 1. Log into your Spotify account on the Spotify mobile app. Swipe left or tap your profile picture.
Step 2. Tap settings and privacy. Tap Playback on the Settings screen. Turn off the toggle for Autoplay.
Now you’ve learned how to turn off Autoplay on Spotify on iOS and Android, your music will stop when you reach the end of your playlist or album. And if you decide one day to have that continuous music play, you can easily reenable it.
Part 2. Turn off Spotify Autoplay on Desktop
How to turn off Autoplay on Spotify using your computer? Spotify also can be accessed from the desktop app. Here we will share steps with you for disabling Autoplay using your computer. Please look at them in detail.
Step 1. Launch the Spotify desktop app on your computer.
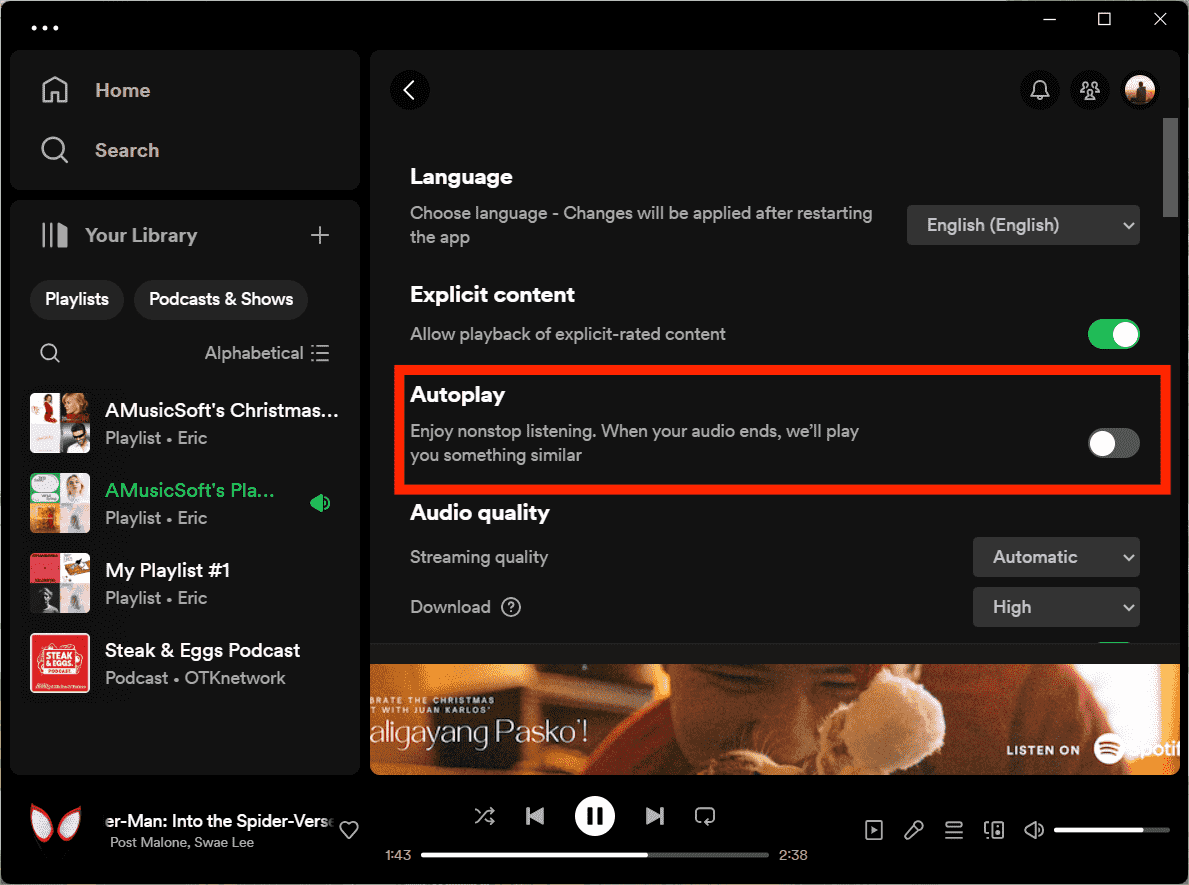
Step 2. Click the Profile icon in the top-right corner of the screen and select Settings.
Step 3. At the bottom of the Settings screen, turn off the toggle for Autoplay (green to gray).
Part 3. How to Fix Autoplay Not Working on Spotify?
There are a ton of playback options offered on Spotify like Autoplay, and once you figure it all out, listening to music will be an even better experience. But sometimes, there might be some glitches when you use the Autoplay feature. Now you’ve learned how to turn off Autoplay on Spotify on the mobile app and desktop app, it's time to learn some possible fixes when Autoplay stops working.
Fix 1: Update the Spotify App (Desktop & Mobile)
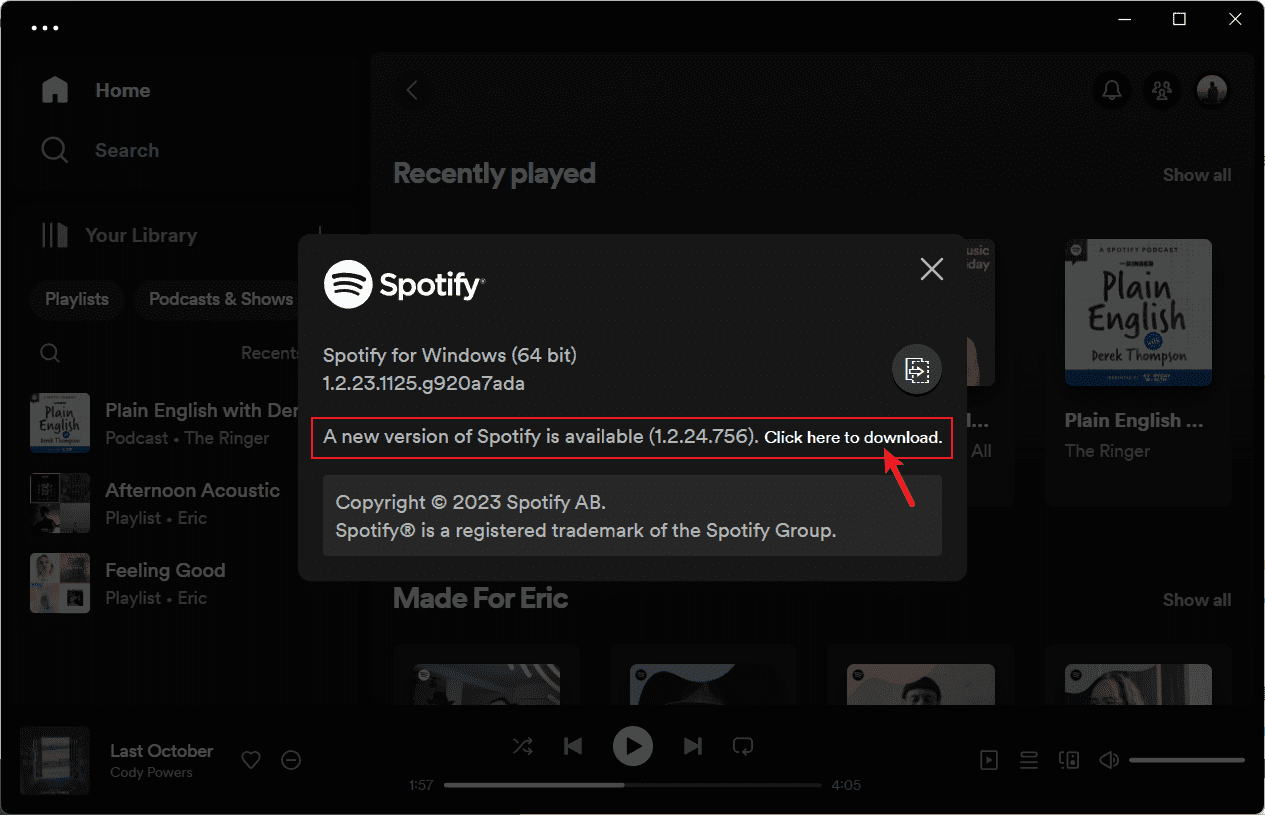
Using an outdated version may lead to such unusual behavior. Hence, it’s a good idea to update Spotify from the Google Play Store or App Store. On the desktop app, there will be a blue dot on your profile picture if has an available update.
Fix 2: Clear the Cache (Desktop & Mobile)
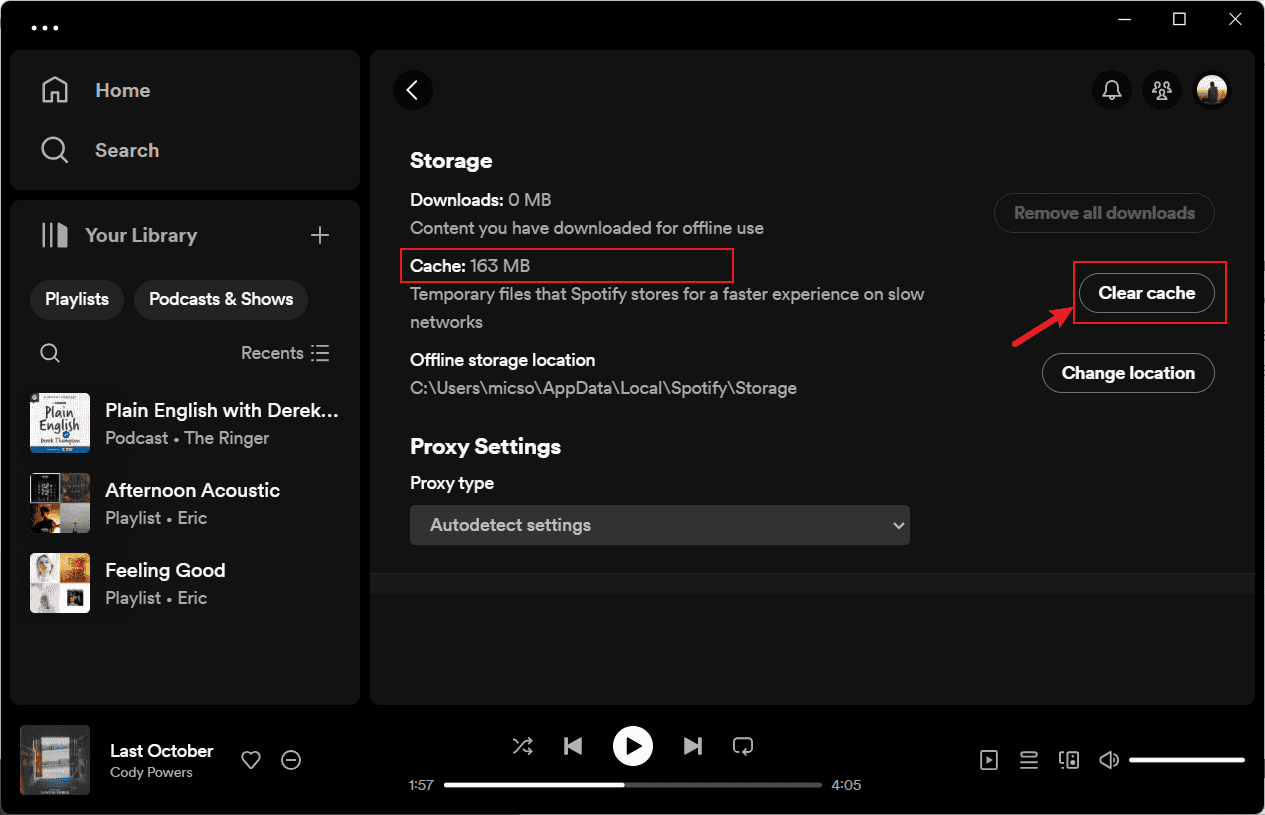
If the app update does not fix the issue, try clearing the app cache. When your device has too many cache files, it is likely to cause a problem with Spotify not going to the next song. In this case, you can try deleting the Spotify cache to free up more space and then check that Spotify Autoplay is working smoothly.
Related Topics: How To Clear Spotify Cache >>
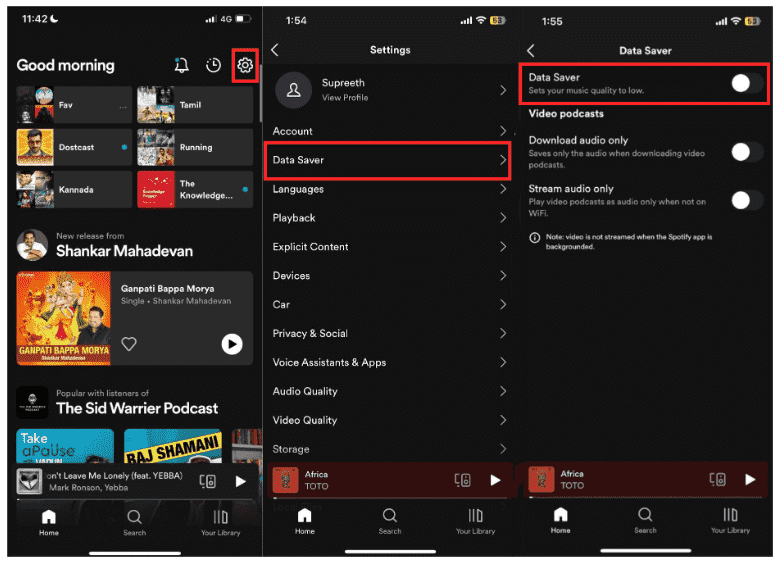
Fix 3: Disable Data Saver (Mobile)
The Spotify app on your Android or iPhone offers a Data Saver option so you don’t exhaust your expensive mobile data while streaming. However, enabling these options can cause problems with features like Autoplay. You can try turning off data-saving features in the Spotify app to see if that solves the problem.
Part 4. Bonus: Control Spotify Music Playback Fully Without Premium
We have shared how to turn off autoplay on Spotify and how to fix if the feature not working. Beyond Autoplay, there are many playback options to control your music playing as long as you have an active Spotify Premium plan, such as unlimited skips and full on-demand playback. In contrast, Spotify Free offers limited features. For example, the shuffle mode on Spotify Free with a cap of 6 skips per hour. Can I make a better listening without Premium? Yes! Thanks to AMusicSoft Spotify Music Converter, you'll be able to download Spotify songs to any music player with more playback settings for playing.
You don't have to upgrade to Spotify Premium plan because AMusicSoft is available for both Spotify Free and Premium users. If you think that it is a hassle to manually download one song after another, with the use of this professional converter that will never be an issue anymore. AMusicSoft can download Spotify songs, playlists, albums, and podcasts in batches, helping you save a lot of time.
AMusicSoft can also make protected songs unprotected by removing DRM from Spotify at 5X faster speed while keeping ID tags from original songs after conversion. It means you can really access it on your device because it is no longer restricted. AMusicSoft Spotify Music Converter provides common output format options including MP3, M4A, FLAC, WAV, AIFF, AAC, and ALAC. With songs in a normal format, you can easily share, edit or transfer them. In this way, you won’t need to access the application ever or connect your device to the internet to listen to Spotify offline.
So, if you are curious and want to experience this wonderful tool, check the steps below that should be followed while using AMusicSoft Spotify Music Converter.
Step 1. To start, you must have the application downloaded and installed first. You can easily do that by just heading to your browser and searching for the specific music converter. Or click the Download button below to get the Spotify Music Converter.
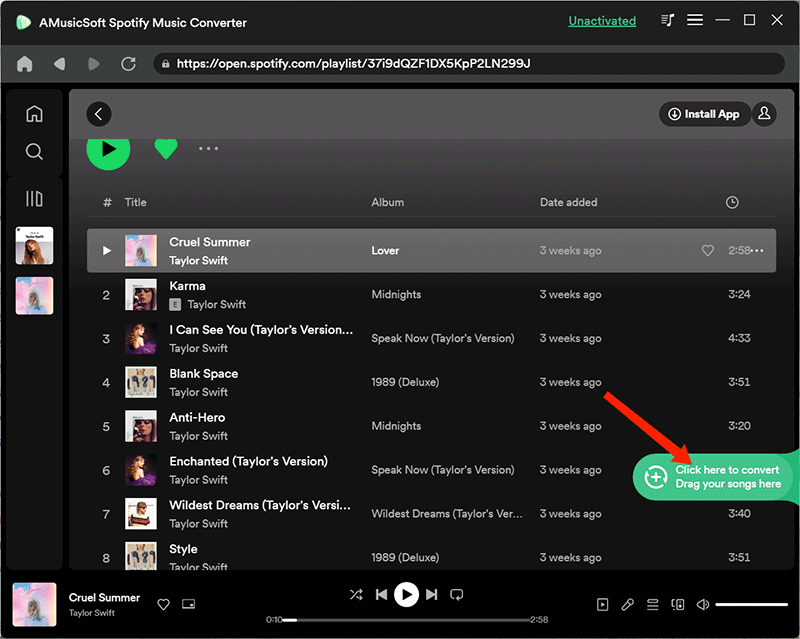
Step 2. To transfer songs from Spotify to other devices, open AMusicSoft software and enter the built-in Spotify Web Player. Then sign in using your own account. Then you can search for the songs you want to download. Simply by dragging them to the "+" button, the software will fetch data from Spotify.
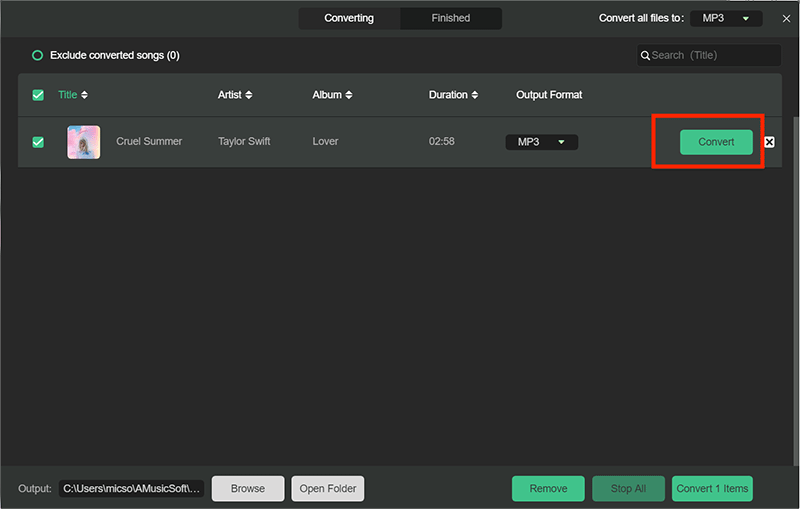
Step 3. After doing so, choose any format you want from the available formats and then create a destination folder for the resulting files.

Step 4. Click the "Convert" button. AMusicSoft Spotify Music Converter will help you remove DRM from Spotify immediately by batch converting them with 5X quick speed.
Part 5. To Summarize It All
The steps on how to turn off autoplay on Spotify are so easy. You can get the experience you prefer if you know what settings to tweak in the Spotify app. By the way, if you want to listen to Spotify freely without interruptions, AMusicSoft Spotify Music Converter is a good choice that can help download Spotify songs locally without Premium, so you can move them to other music players to play on demand.
People Also Read
- How Many Skips On Spotify Free? Get Unlimited Skips Here!
- Spotify AI DJ: How To Use Spotify DJ Mode?
- How To Set Up Spotify Timer On Mobile/Desktop?
- Where Does Spotify Store Offline Music on Windows?
- How To Turn On Offline Sync Docs On Spotify App?
- How To Clear a Queue On Spotify On Desktop and Mobile?
- How To Turn Off Shuffle On Spotify Without Premium?
 About The Author
Robert Fabry is an ardent blogger, and an enthusiast who is keen about technology, and maybe he can contaminate you by sharing some tips. He also has a passion for music and has written for AMusicSoft on these subjects.