Importing Songs To GarageBand -The Proper Way To Do
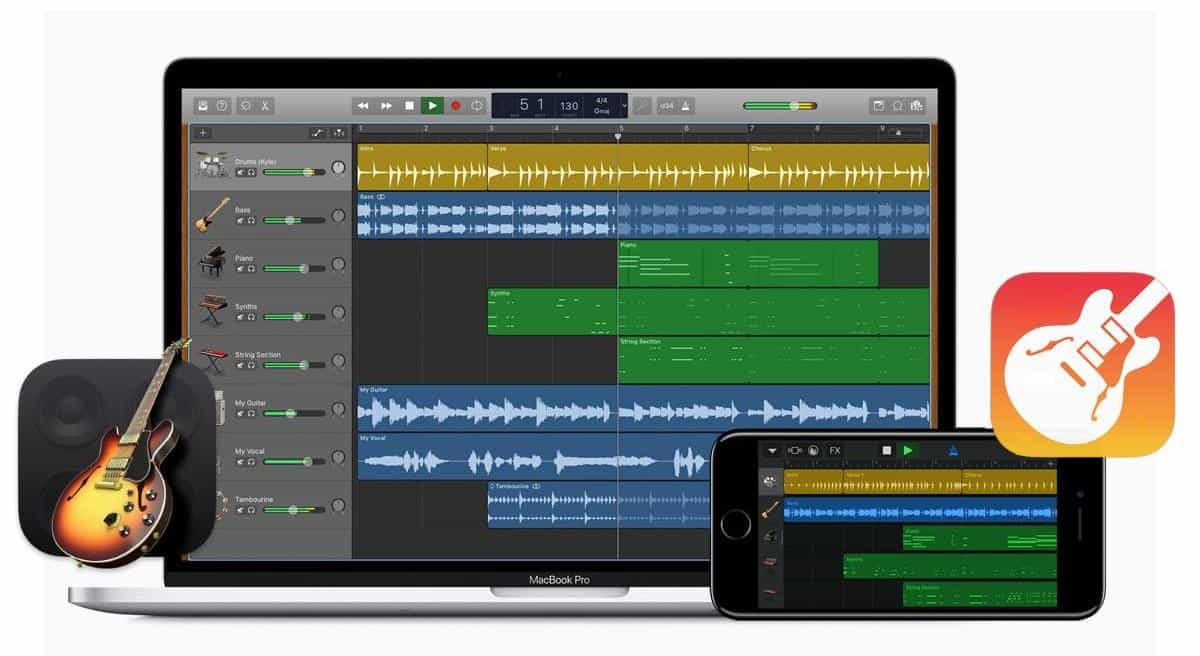
GarageBand is one of the most successfully established audio software. If you have an Apple device, you are surely aware of this application already. As soon as you acquire an iPhone, for example, you will surely notice that GarageBand is already installed on it. This is because GarageBand is one of the pre-installed applications on iOS devices. Most of the Apple users are possibly not aware of this app, but not knowing much about GarageBand might be a disadvantage for you.
Importing songs to GarageBand is only a simple and easy process. By following the correct procedures properly, you can have the songs on your GarageBand quickly. To learn about these steps, keep on reading until the end of this post.
Contents Guide Part 1. What is Garageband?Part 2. How Can You Import Songs to GarageBand?Part 3. Most Reliable Way to Import Songs to GarageBandPart 4. Conclusion
Part 1. What is Garageband?
In addition to the description provided above, below are the major features of GarageBand. Check them out.
- Accordingly designed interface made the navigation within the application much easier and faster.
- It supports a variety of audio and instruments that can be added into your music when editing. The good thing about them is that even if you are just a beginner, understanding and selecting which to add and which is not appropriate is surely simple and easy.
- With GarageBand being utilized, you may not need to use any type of audio gear.
- GarageBand also promotes an easy way of sharing and making your own music.
- This is also a free software which will not require you to pay for any cent in order to continue.
- Since iCloud and GarageBand was made affiliated or connected with each other, adding tracks across Apple devices has now become more convenient than ever.
- Even live music acquired from playing instruments while being connected to GarageBand is also possible. All you have to do is to plug-in your instrument, start playing some music, record it and finally put it on your music library.
- Most importantly, importing songs to GarageBand is made doable.
Part 2. How Can You Import Songs to GarageBand?
Before proceeding to the main process, you should know first where to get the songs to be imported. Look for the correct location and then launch your GarageBand app on your used device. After that, you may then start creating a new project where the song is to be imported. You may also use the old ones if you happen to already have an existing file on it.
Now, if these preparatory steps are already followed, you may then proceed with the procedure below about how to import songs to GarageBand.
Steps to Import Songs into GarageBand on iPhone and iPad
There are two ways to do when importing songs to GarageBand on your iOS device. You may follow the procedure which you think would be easier for you to finish.
Procedure 1
- Since GarageBand was launched on your iPad or iPhone already, go to the section of My Songs.
- Right after that, select the button of New Audio Recording, which is represented by the symbol of microphone, and follow it with the Voice button.
- Then navigate to the Tracks view and then do some adjustments on the audio file to be imported.
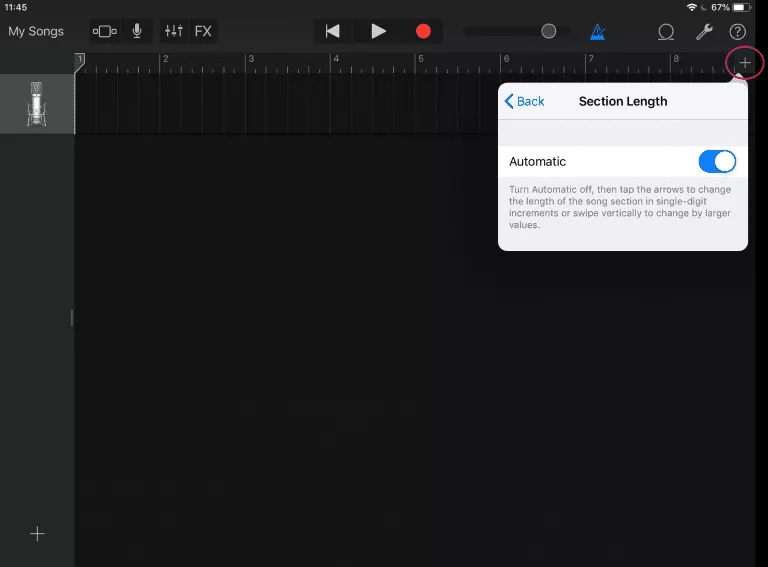
- For the song adjustment, make sure that the song section length is changed to automatic. By doing this, you will be able to avoid a cropped file. Click the plus icon located at the upper right part of the music. Make sure to check if Section A has been set to Automatic.
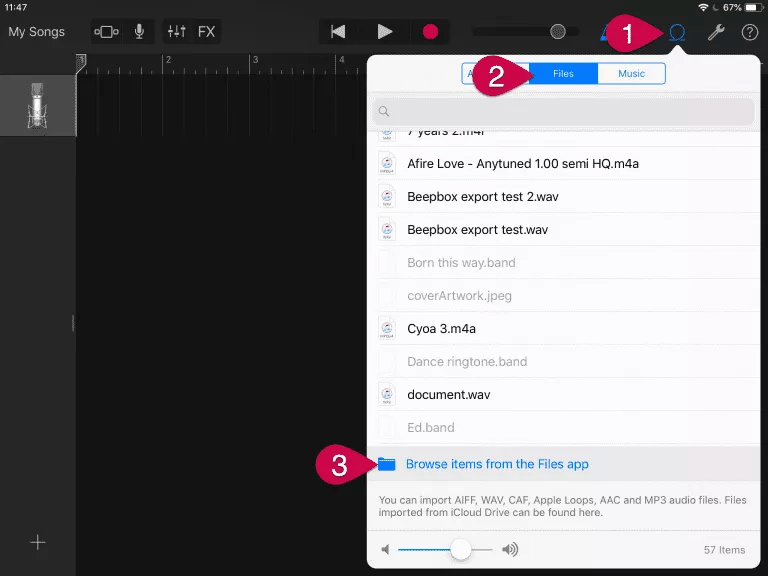
- Now, hit on Loop Library and then click on the Files button. After a few seconds, you will then be displayed of all the songs that have been imported from your iCloud.
- To look for the particular song file that you want, you may click on Browse items from the Files app button.
- For the last step, just hold down the selected file and then drag it into GarageBand.
Procedure 2
- Open your iPhone or iPad and then log in using your registered iTunes account.
- After doing so, open your GarageBand application.
- Before you proceed, better check first if the option of iCloud Music library has been activated.
- Head to the Track View section and then select Loop Browser and lastly, Music option.
- This will then generate all the available converted songs that are encoded in a supported format. Choose the songs that you want to get imported into GarageBand.
Steps to Import Songs into GarageBand on Mac
Aside from using your iPhone and iPad, importing songs to GarageBand may also be done on Mac computers. Check out the procedures below.
Import Songs Saved in iCloud
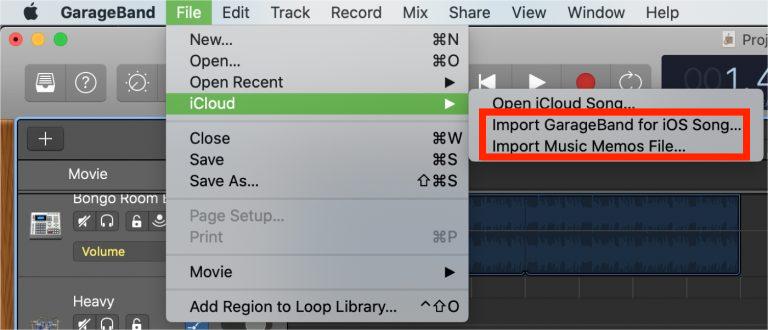
- Launch the GarageBand application on your device and then tap the File tab from the menu bar at the top.
- From the displayed window, click the iCloud option.
- Upon clicking on the said option, more options will be shown including “Import GarageBand for iOS”, “Import Music Memos File” and “Open iCloud Song”. You may select whichever from the first two options.
- Go to the location where the songs are saved and then select the Open button upon the selection of song.
Import From Locally Saved Songs
- Open the GarageBand application on your device and then put the cursor into the final destination of the songs.
- Do a right click on the Audio track location selected and then choose Add Audio File option.
- This will show you then the possible locations of the songs to import. Choose the song title and then select them.
- To finally complete the process of importing songs to GarageBand, just tap the Open button.
Import Other Types of Media into GarageBand
For this procedure, we will utilize the Media Browser section. This is a location where all of the media files on your Mac may be saved and collected. To give you an example, you can find your photos, iTunes, music and more, from this location. Follow the steps below.
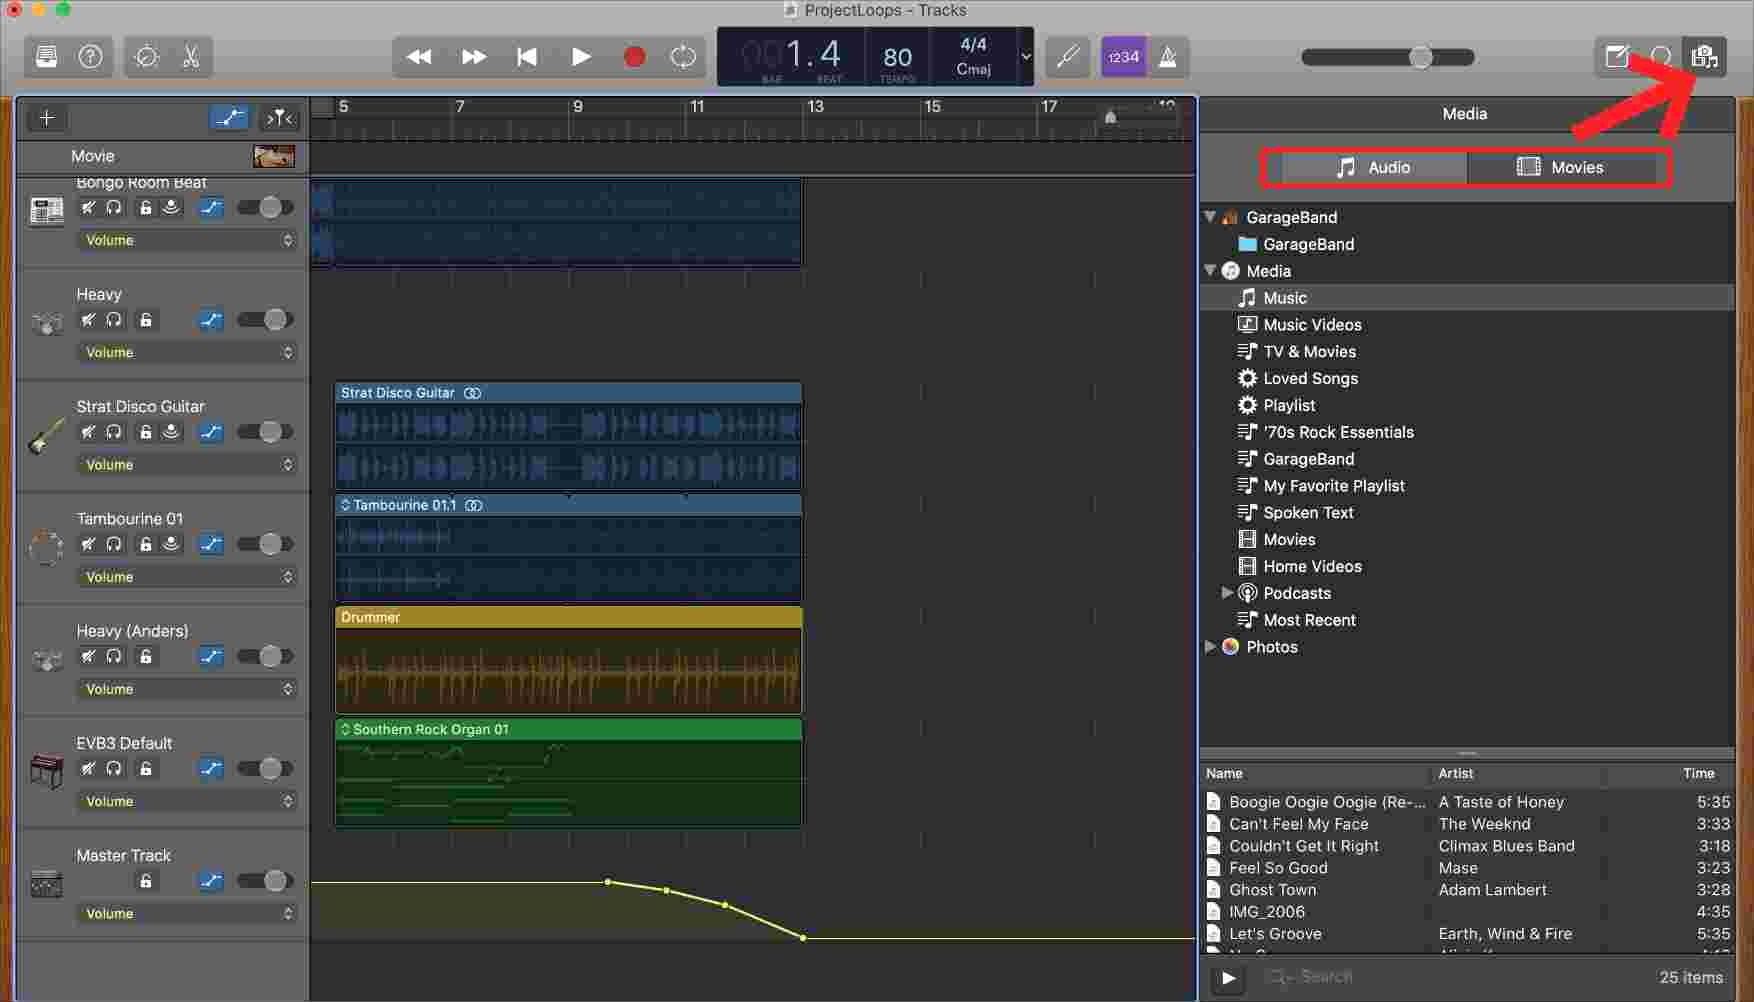
- Hit the button of “View or Hide Media Browser”. To easily locate this, you can find it from the upper right part of the GarageBand main interface.
- Wait for a while until the browser has opened completely. Once opened, select either Audio or Movies section.
- You may then start adding the songs you want by checking on the categories available for adding. To import them, just drag and drop them into the audio track.
Part 3. Most Reliable Way to Import Songs to GarageBand
Importing songs to GarageBand is not just a process that you can succeed at by finishing the steps given. If the songs that you are to import are protected with DRM Content Encryption, then it might be hard for you to add them into the GarageBand application. If you are planning to import songs from any of the music app you have, then make sure that they are DRM free or unless, you won’t be able to succeed. Another one to note is that only locally saved files, in addition to unprotected songs, could be added into GarageBand.
After knowing about the conditions, you must have thought by now about the possible thing to do in order to make the Music app items free from DRM. To help you, you may use AMusicSoft Apple Music Converter. DRM removal from Apple Music songs is one of its major services offered in addition to conversion and download.
By using this application, you can have the songs saved in another format and make them as local files on your computer. Since AMusicSoft can also convert music files, you can surely have a new song format including MP3, FLAC, WAV, AAC, M4A and AC3. Not only you can add them to GarageBand, but also add music to Final Cut Pro from Apple Music. Moreover, you can play converted music on any device and music player.
While using AMusicSoft Apple Music Converter, you will surely find it amusing as that all the results of conversion can be done in just a few minutes. This is made possible through the help of AMusicSoft’s 16x faster conversion and download speed. Despite the quick duration, AMusicSoft is still able to provide a good quality for the downloaded audio files.
- To start using AMusicSoft Apple Music Converter, the application must be downloaded and installed first on your computer. Go to the website of AMusicSoft and get the application by tapping on the Download button. You can have this done via your browser.
- Add the songs by selecting them from your collection. Mark the boxes of each song title you chose from the list of songs you have.

- Select one output format to utilize along with the output folder where the results are to be saved afterward.
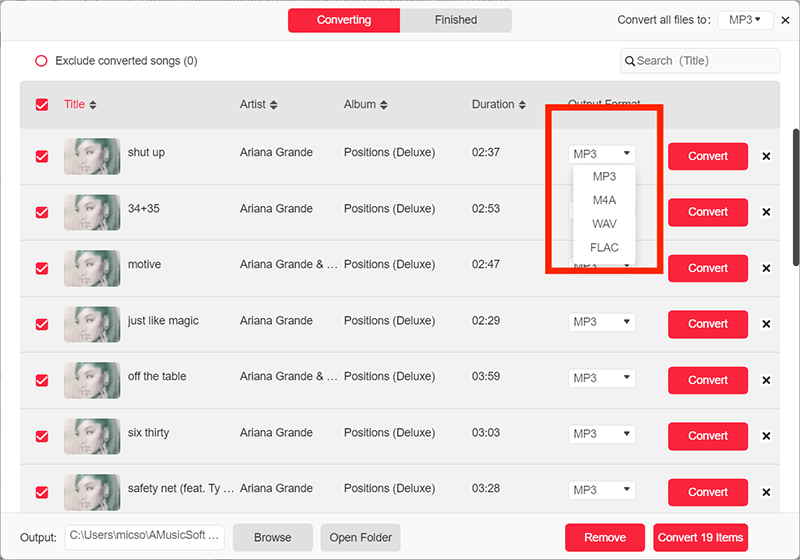
- Hit the Convert button to begin the process.

- Lastly, download the results from the Finished tab.
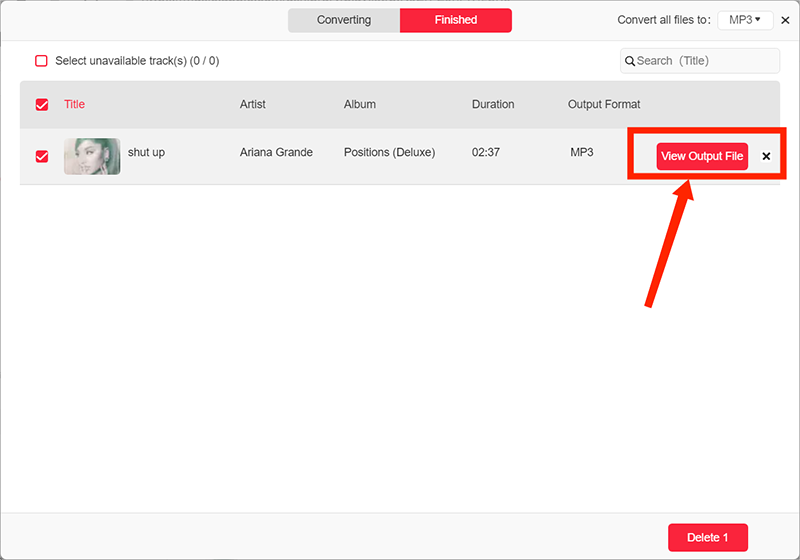
Once the results are out and you already have them saved as local files, follow the provided guide above about how to import songs to GarageBand.
Part 4. Conclusion
To conveniently know the perfect thing to do when importing songs to GarageBand, you may follow the complete and detailed guide above on how to do this. You may either use the local files on your computer or some DRM-free music for such procedure. But if the songs that you want to use are protected, I’d recommend using AMusicSoft Apple Music Converter application. All of its best features are stated above, which you can use to download supported audio files.
People Also Read
- Top Ways To Fix Apple Music Not Downloading All Songs Issue
- Easy Fixes For Apple Music Not Syncing To Mac Issue
- Guide About How To Keep Apple Music Separate Family Plan
- How To Set A Ringtone From Apple Music Without iTunes
- Do I Keep Apple Music Downloads: Things That You Need To Know
- Why Is Your Song Not On iTunes And How To Fix It
- Enjoy Apple TV With Apple Music Via The Most Convenient Way
 About The Author
Robert Fabry is an ardent blogger, and an enthusiast who is keen about technology, and maybe he can contaminate you by sharing some tips. He also has a passion for music and has written for AMusicSoft on these subjects.