How to Get Apple Music on Mac
Apple Music is a very widely used streaming service especially for those who are music enthusiasts. It is a catalog of millions of songs from different artists. Not only that, if you are also fond of listening to podcasts, but Apple Music also has it too. It is like by using Apple music you can have access to any music or even in any podcasts that you like. But many were asking which devices it is compatible and one on the list is the Mac. If you are one of these people who is curious about how to get Apple Music on Mac and want to know how then just keep reading this article.
Contents Guide Part 1. How Do I Sign into Apple Music on My Mac?Part 2. Can I Download Apple Music to My Mac?Part 3. How to Listen to Apple Music on Mac for Free?Part 4. To Conclude Everything!
Part 1. How Do I Sign into Apple Music on My Mac?
So, before I begin to explain how to get Apple Music on Mac, let’s make sure that you have your Apple Music with you. If you still don’t have one yet, no need to worry because I included here how to subscribe to Apple Music then we will proceed on how to sign in Apple Music on your Mac.
For you to subscribe to Apple Music see the following steps I provided below: (if you already have an Apple Music subscription you can skip this part)
- Open your Apple Music app (if you still don’t have it then you can download it on your App store), then from there click or select “For you”.
- After that, you will be directed to a trial version of Apple Music. Then you will be asked which subscription type you like it could be individual, family sharing which you can share up to six persons or a student subscription. If you are still not decided which subscription type you like, you can try any one of the choices first then just modified it later on if you wish to change it, so don’t worry.
- Next, you will be asked to sign in your Apple ID and also your password.
- Lastly, they might ask you to confirm your billing information and you will be needing to provide a valid payment method for that. Just click or tap “Join” then agree with the terms and conditions if prompted.
Once you finished the following steps above, you successfully subscribed to Apple Music and can use it to any devices that you like by signing in the Apple ID that you registered. But in this post, we will just focus on how to get Apple Music on Mac.
So, for you to able use your Apple Music on Mac, just continue reading the following steps below:
- Run your Apple Music app that is installed on your Mac
- Next, on the upper portion of your screen, you will see the menu. Click it then choose Account then Sign in.
- Finally, Sign in your Apple ID along with your password to complete the process.
Part 2. Can I Download Apple Music to My Mac?
Since downloading is favorable and popular to most people nowadays because it allows individuals to listen to their favorite tracks even if there is no internet connection or when offline, there are tons of questions related to how to get Apple Music on Mac, is it possible to download Apple Music to Mac? and is it possible to Stream Apple Music on iPod? The answer is definitely yes! There are ways for you to do that. One with subscription and the other one is without a subscription. I’ll be going to discuss each step on this part.
How to Get Apple Music on Mac with Subscription?
So, for the first method, if you have an Apple Music subscription you can download music or songs from your Apple Music App to your Mac by following these steps.
- Launch your Apple Music app that is installed in your Mac
- Search for the music you wish to add to your music library.
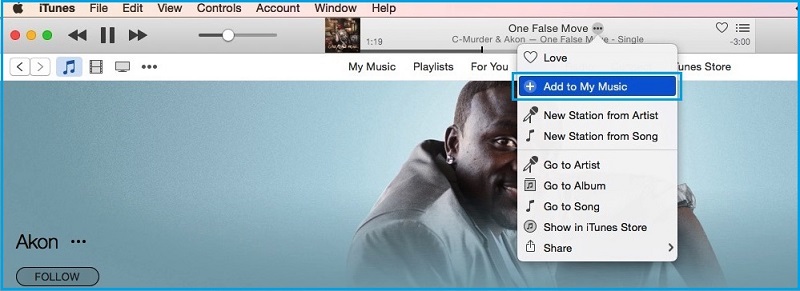
- For you to include a song in your library just simply select the add button +. If you wish to include the whole playlist or album select +Add.
- Next, for you to finally can listen to songs even if you are offline, you can either add it in your library by tapping or selecting the download button and the other one is, by finding the playlist in the sidebar and select download button.
So, do you want to know how to get Apple Music on Mac without Apple Music subscription? You can download your favorite tracks in two ways, one is from purchasing music through you iTunes and the other one is by using a professional tool. If you want to know how I’ll further explain this part.
For you to purchase music through iTunes Store even if you don’t have an Apple Music subscription using your Mac. You can refer to the following steps below according to which macOS you are using.
For macOS Catalina you can purchase by these steps:
- Open your Apple Music app that is installed in your Mac
- Find the album or song that you prefer by using the search bar.
- Just below the volume controls, select the iTunes Store button once you see it.
- Tap on the price to purchase the song or album that you like
- Once purchased, the song will now be visible in your library. Now you can download the music by tapping or clicking the download button so you can play it even if you are offline.
If you are macOS is Movaje or earlier just follow these steps.
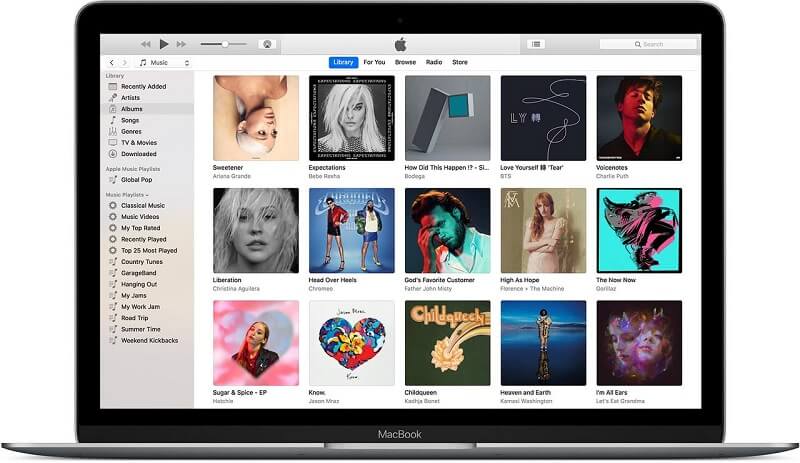
- Launch your iTunes.
- Select Music from the pop-up menu then taps or click Store that is present on the navigation bar.
- Search for the song or album that you prefer and click the price to purchase it.
- Once purchased, the song will now be visible in your library. Now you can download the music by tapping or clicking the download button so you can play it even if you are offline.
If you can’t see the iTunes Store on your Mac
- Launch the Apple Music app.
- Choose Music in the menu bar then click Preferences.
- Proceed to the General tab then choose iTunes Store.
- After that tap or click Ok.
How to Get Apple Music on Mac without Subscription?
As I mentioned, aside from purchasing from iTunes without Apple subscription, another option for you is by using a professional tool that can convert the songs you like so you can get Apple Music on Mac. The best choice for this is the AMusicSoft Apple Music converter. So, why still need a converter, and why AMusicSoft Apple Music converter? All songs or tracks from Apple Music is protected because of its FairPlay. FairPlay is responsible for preventing users to download Apple Music without a subscription and maintains the DRM and one feature of a converter is to remove the FairPlay.
To give you a bigger picture of what is AMusicSoft Apple Music Converter is a kind of software that allows you to convert any type of music or audio format to your preferred format that is compatible with Mac. For example, the format present from Apple Music is in M4P, this kind of format is protected. So, for us to use it even we don’t have a subscription we need to convert it to another format such as MP3 or WAV. And what’s good about this is that you can keep the converted tracks forever and can use it to any device that you have without worrying even your subscription is over.
Another one great feature of this software is that it keeps the quality of the music even if it has a conversion speed of 16x. With such speed, you don’t have to wait for a long time for your music to be converted. You can also customize or edit the details of the song such as Artist, Title, etc. after conversion. Not only that, your converted music is not just exclusive on your Mac but also you can use it to any device that you have, it can be your smartphones or smart speakers. So, by getting a converter this is another way on how to get Apple Music on Mac.
Steps to Get Apple Music on Mac with AMusicSoft Apple Music Converter
So, if you want to see for yourself how amazing AMusicSoft Apple Music Converter is, you can just follow the steps that I provided below:
- Visits its official website, then click on the download button.
- Choose the location folder you want your software to be installed.
- Lastly, Launch the AMusicSoft Apple Music Converter shortcut on your desktop once installed. installation.
Now that you have the AMusicSoft Apple converter let me show you how you can convert the songs so you can use it on your Mac.
Step 1. Selecting songs from Apple Music.
On you, Mac, launch the AMusicSoft Apple Music Converter shortcut. The software will automatically scan your Apple Music library. It will be going to take some time to scan so be patient. Once the scanning is finished, you may now select the songs that you like.

Step 2. Choosing the output format and path of the converted songs.
If you already finalized the songs that you wanted to convert, select the type of format that is compatible with your device, and also you will get a chance to choose the destination folder of your output path.
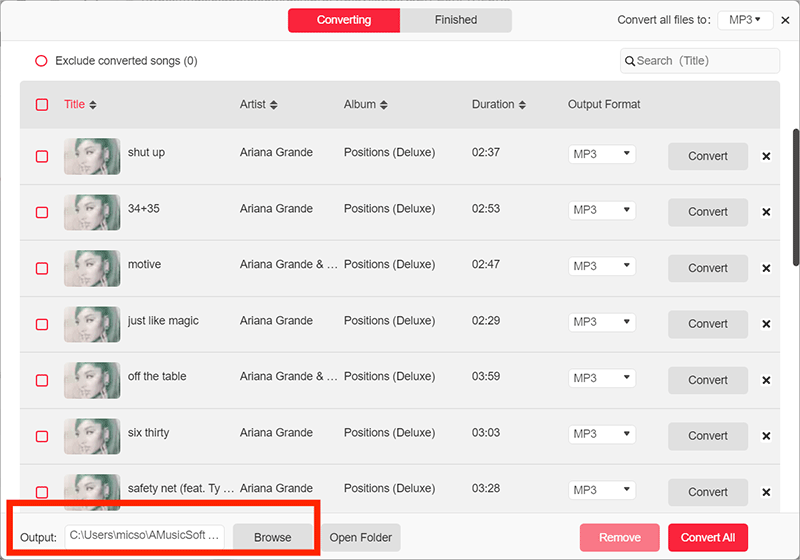
Step 3. Click the “Convert” button to start converting your selected Apple Music songs.
If you are already satisfied with your output format and destination path, tap on the “Convert” button to begin the process. You will be aware of the status of your conversion because it is visible in the main interface. After the conversion is done, you can view the converted music or tracks on the “Converted” section.

Now all your Apple Music that you selected on step 1 is available and saved on the local file of your Mac. You can now freely listen to it whenever you like and even if you are offline and out of a subscription.
Part 3. How to Listen to Apple Music on Mac for Free?
Most of us know that Apple Music offers three months trial period from the moment you first registered as a user, but do you know that there is also a trick that you can use for you to get additional three months for free? But let me remind you first that if you don’t have any intention to pay for your Apple Music after your three months free trial period, you have to cancel your subscription before it expires because it will renew automatically meaning you will have to pay for it.
So, back to the trick. As I mentioned earlier in this post. Apple Music has three available plans: Individual, family, and student. For you to get additional three months trial period, all you have to do is to get another family member to sign up in Apple Music and avail the family Sharing plan and let them share it with you. By doing this, it will be going to give you additional three months subscription for free not only that this plan can be shared to six people it can be either your family or you friends so it means that more people can enjoy Apple Music for a longer period by using this trick. This gives you additional information on how to get Apple Music on Mac for free.
Part 4. To Conclude Everything!
There are ways how to get Apple Music on Mac, it can be with Apple Music subscription and without a subscription. We also showed you each step on how to do so. We also introduced you to a professional tool that can help you convert the songs from your Apple Music so you can also have access to it for free on your Mac. Also, or as a bonus, we also provide you a trick on how to get Apple Music on Mac for free for additional months. I hope that this guide helped you and gave you insights on how to get Apple Music on Mac.
People Also Read
- How to Play Apple Music on iPhone 4
- How to Play Apple Music on iPod Shuffle
- Does Apple Music work offline?
- How to Play Apple Music on Google Home
- How to Play Apple Music on Apple Watch
- How To Play Audible Audiobook On Apple Watch
- Play Apple Music On PC Without iTunes
- An Easy Guide To Remove DRM from Apple Music
- Solutions: How to Stream Apple Music on PS4
 About The Author
Robert Fabry is an ardent blogger, and an enthusiast who is keen about technology, and maybe he can contaminate you by sharing some tips. He also has a passion for music and has written for AMusicSoft on these subjects.