How to Transfer iTunes Backup to iCloud? [2025]
It is annoying to lose all of your iTunes libraries because your computer or phone crashed. This is why iCloud is a cloud storage service from apple. This service offers you 5Gb free storage space, which is a good offer for iTunes users. But how to transfer iTunes backup to iCloud is a little bit tricky.
This article will clarify if it is possible to back up iTunes to iCloud in part one. In contrast, the second part is about how you can transfer the iTunes library to iCloud using your computer and iPhone. The last part is a professional program that will enable you easily transfer files from iTunes to your iCloud storage account.
Contents Guide Part 1. Is it Possible to Back up iTunes to iCloud?Part 2. How Do I Move My iTunes Backup to iCloud?Part 3. Transfer iTunes Backup to iCloud with AMusicSoftPart 4. Conclusion
Part 1. Is it Possible to Back up iTunes to iCloud?
Yes, you can transfer iTunes backup to iCloud with simple steps. This is the best way to access the iTunes library on any device. You should note that iTunes is just a media player, but music files are saved in the internal storage space. For example, on your computer, it is stored in the hard drive. Backing up the iTunes library to iCloud will help you in case your hard drive crashes.
Part 2. How Do I Move My iTunes Backup to iCloud?
You will get 5Gb of free storage space once you open the iCloud account. However, you can increase the storage space by subscribing to monthly payments. It will be easy to transfer iTunes backup to iCloud when you have iPhone or any other apple device. For such devices, the procedure is direct from the settings menu.
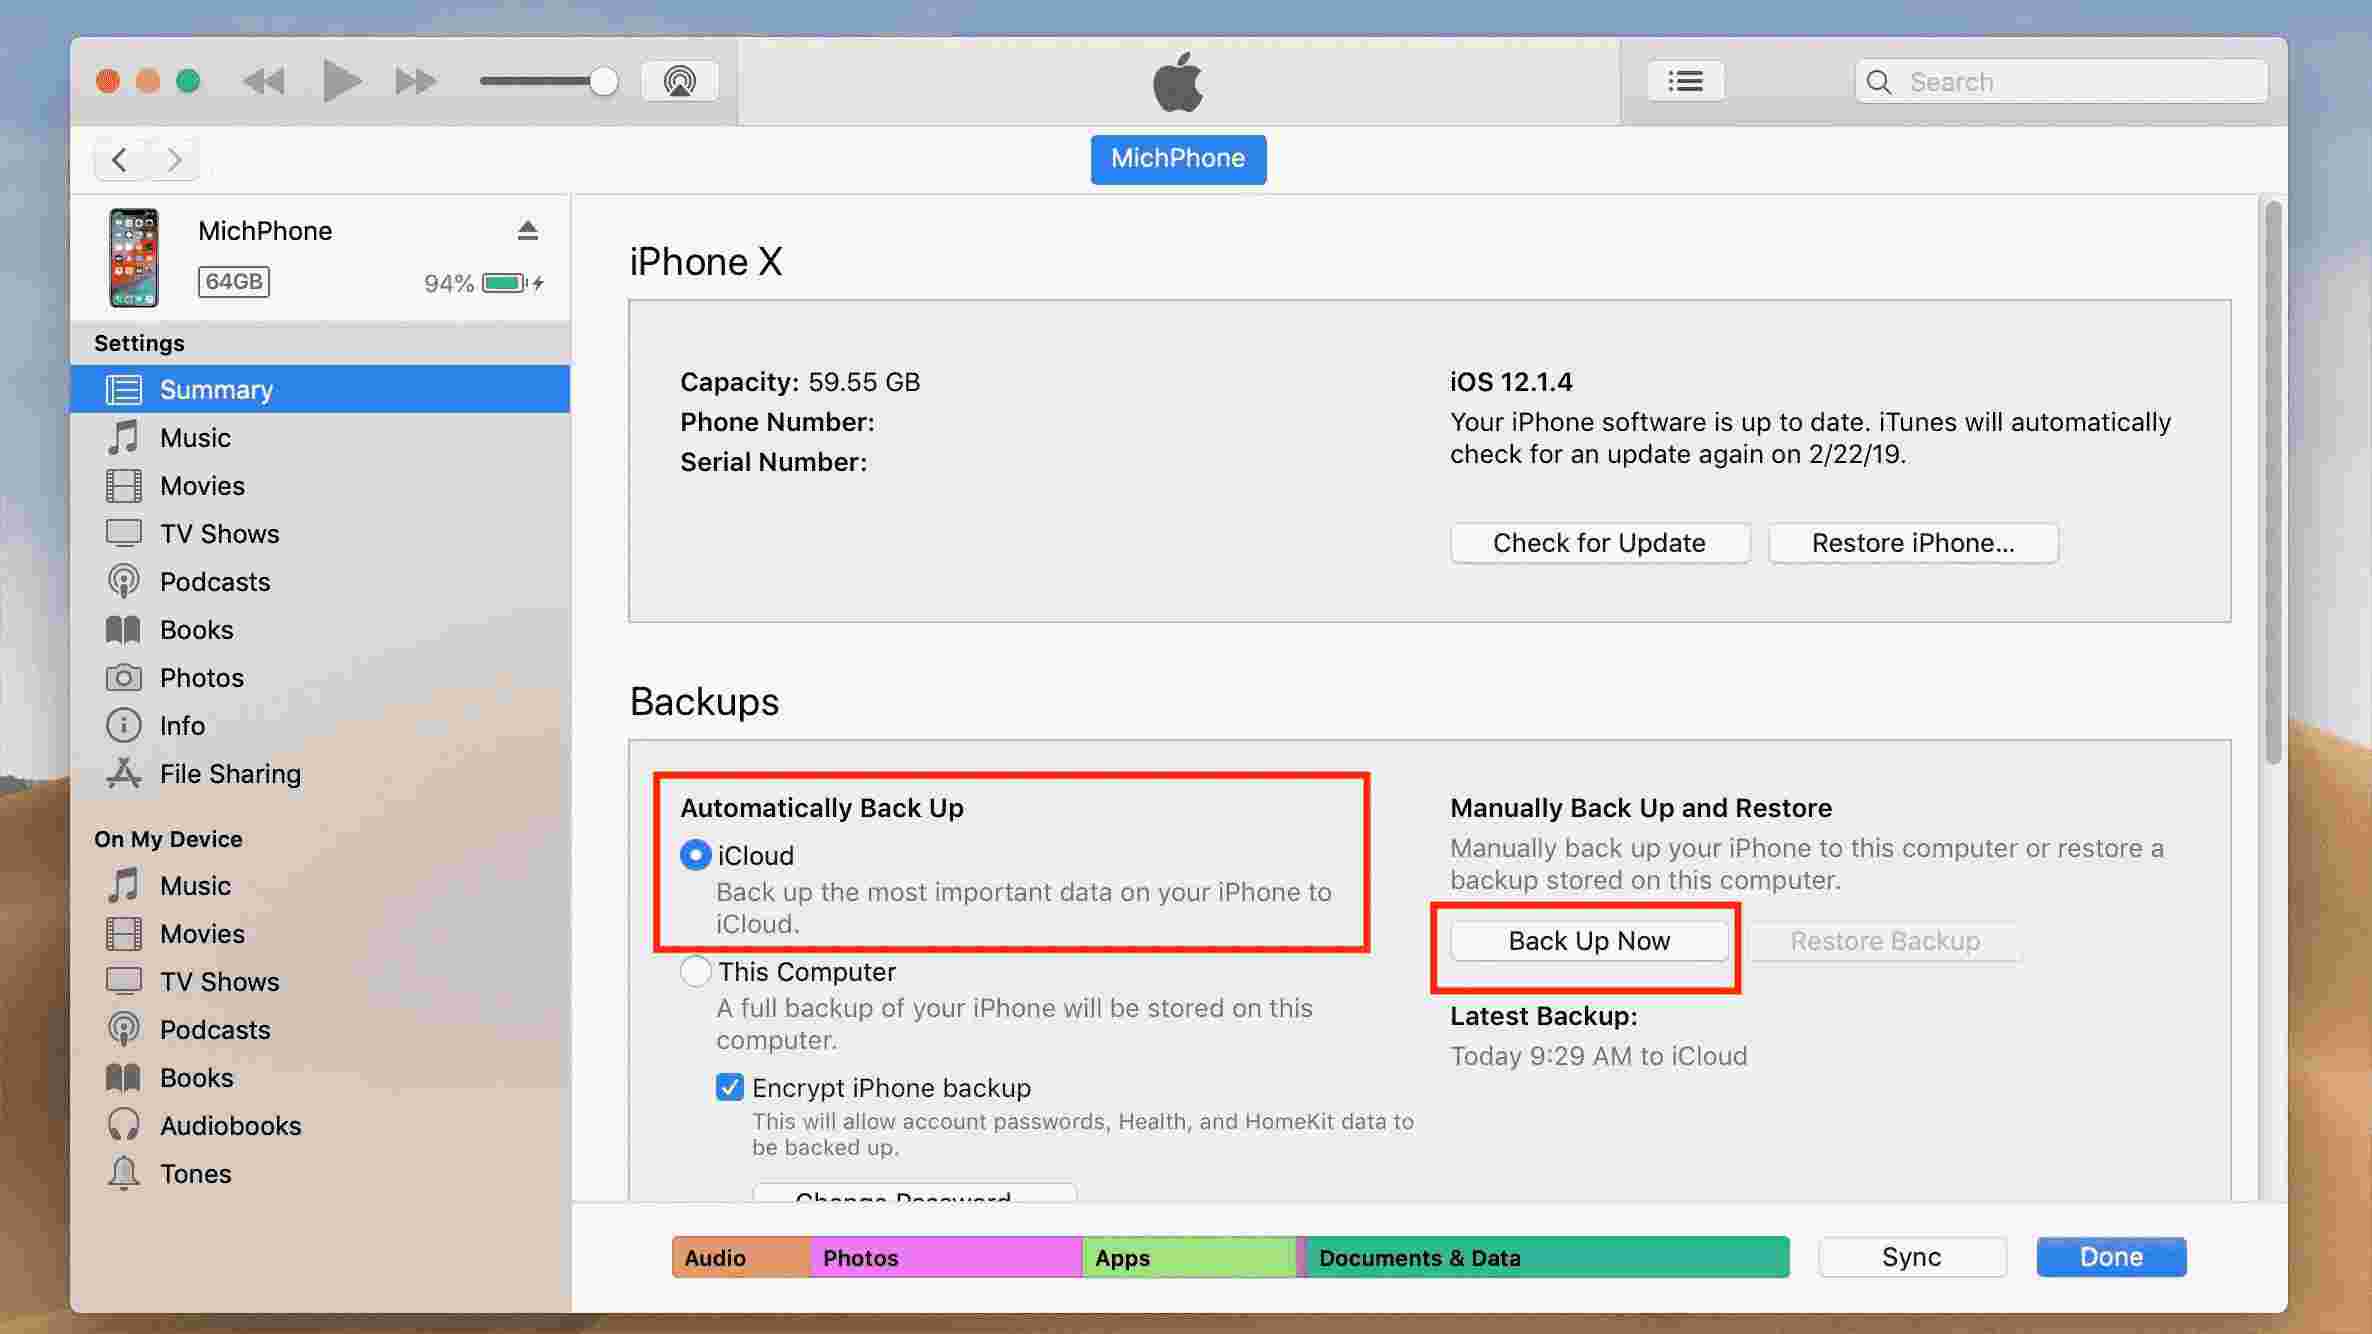
On the other hand, you can back up to iCloud by using a computer. Simply connect your device to the computer and select the files you wish to back up. Here is how to back up iTunes to iCloud on your computer.
Step #1. Open the iTunes application on your computer and connect the external device to the computer using the appropriate cable.
Step #2. Immediately the external device will be recognized on the computer, where you will select it via the iTunes window.
Step #3. Click on “automatically backup to,” and two options will appear. You will click on the checkbox that has “backup to iCloud.”
Step #4. Click on “Backup now,” and the transfer to the iCloud account will start.
If you have an iPhone, then use the following steps to transfer iTunes backup to iCloud.
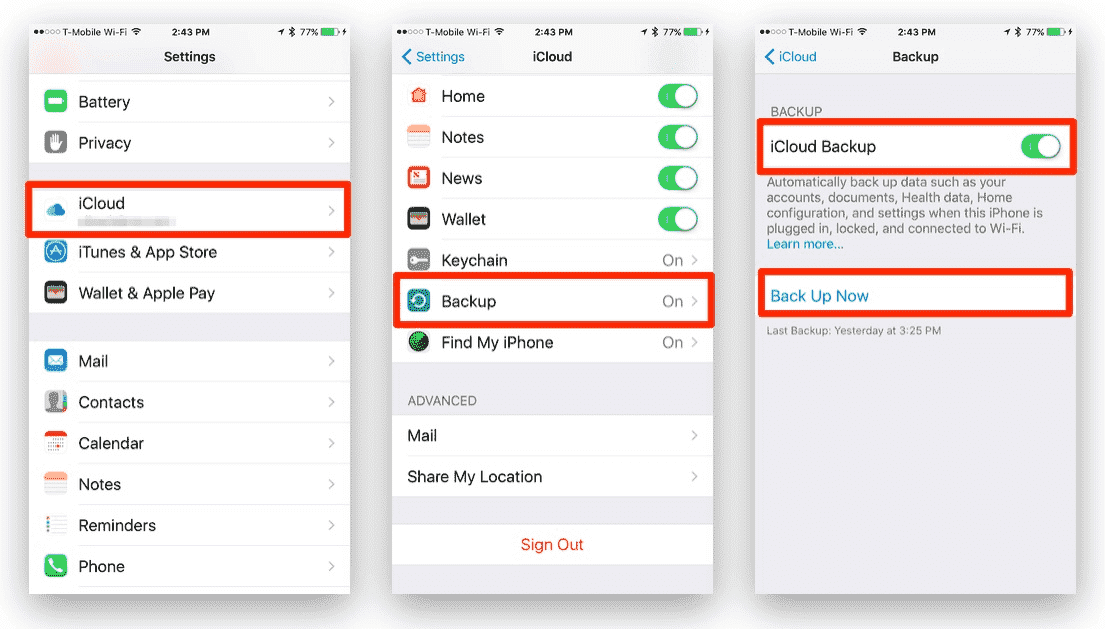
Step #1. Open the settings application on your iPhone.
Step #2. Navigate to the iCloud option and tap on “Backup” option
Step #3. Turn on the iCloud backup button, then choose “Backup Now” at the bottom of your screen. And the transfer will begin.
Part 3. Transfer iTunes Backup to iCloud with AMusicSoft
It is always great to transfer iTunes backup to iCloud, but sometimes you will find music on the iTunes library has DRM protection. This encryption makes it hard to transfer files to other devices. The non-compatible device will not transfer the files to iCloud. So you need to use AMusicSoft Apple Music Converter.
This is a program that will download iTunes songs and remove DRM protection making all files on iTunes free of encryption. It makes it possible to transfer music files with a simple USB cable to other devices. It has high conversion speeds of 16x that will save most of your quality time. It also has several output formats starting with MP3, WAV, FLAC, and AAC.
The program is special enough to run on two operating systems. These are windows and mac computers. Moreover, it is user-friendly because it automatically imports files from iTunes and the apple music library. The software is easy to learn how to use because it has three direct steps and the best graphics that look attractive.
Furthermore, it keeps all ID tags and metadata information that you can customize. Customizing output files helps you personalize your library. In addition, all files come out of the highest quality. Nothing will fall out of place when you listen to the converted files. This software can also handle many files at the same time without hanging. It must be your first choice to use in the processing of the conversion of your files so you can be able to burn music from iTunes to CD on your PC.
It is professional software that can work smoothly with other programs on your computer. It can also run in the background as you work with other things. It does not require a huge RAM or a powerful CPU; hence convenient for people with small computers. There is a free trial version, and you will also access free updates when you purchase the program.
See the steps to follow on how to transfer iTunes backup to iCloud with AMusicSoft properly
Step #1. Open the application and allow it to sync files from the iTunes music library. Or simply drag and drop the files from the storage folder.
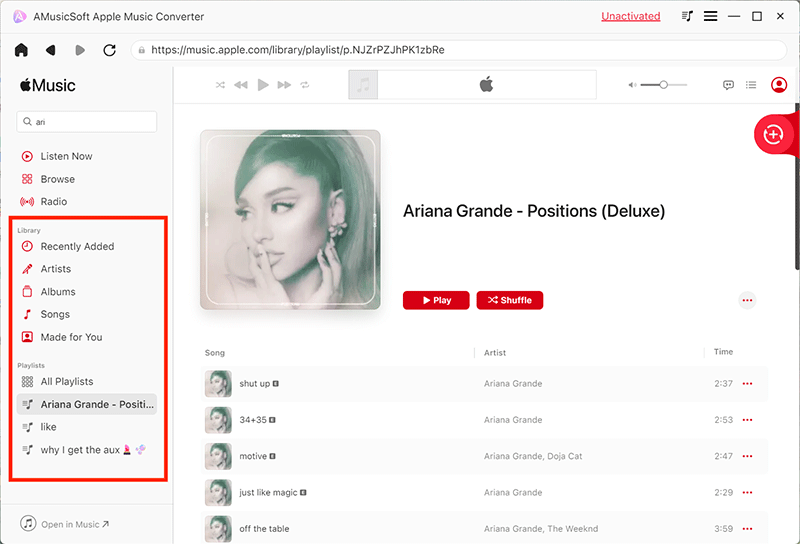
Step #2. Now select the output format and output folder. Make sure you remember the output folder once the conversion process is done.

Step #3. Finally, click on the convert button, and the conversion process will start. You will transfer the converted files to iCloud from the output folder.

Part 4. Conclusion
You can see how to transfer iTunes backup to iCloud is very easy when you have an iPhone. Use the setting side to turn on the backup button. However, you can also backup your music library to any other external storage device like a flash drive with the use of AMusicSoft Apple Music Converter. Use the free trial version to test the features of this excellent software.
People Also Read
- Learn About The Methods On How To Play iTunes On Alexa
- Best Possible Ways To Enjoy iTunes Xbox One
- “How Do I Get Alexa To Play My iTunes Music” - Solved!
- How to Fix iTunes Songs Greyed Out: A Guide for You
- Can I Recover iTunes Library: Get It Here
- How To Convert To MP3 In iTunes
- Best Ways: How to Export Songs From iTunes
- Why Is iTunes Splitting Albums Into Two?
 About The Author
Robert Fabry is an ardent blogger, and an enthusiast who is keen about technology, and maybe he can contaminate you by sharing some tips. He also has a passion for music and has written for AMusicSoft on these subjects.