How To Make Spotify Playlist Private On Computer And Mobile
If you are just new to Spotify, know that this service was designed with a lot of social features particularly for sharing files with others. However, there are some users who do not wish to share their own curated playlist or their listening history to the public, which is just normal and fine. If you are also the type of streamer who agrees with the latter, then you should learn about how to make Spotify playlist private.
Fortunately, Spotify has made it possible as well for such users to have the option of keeping their music private. And that is exactly what to be tackled in the upcoming discussion.
Contents Guide Part 1. How to Make Your Spotify Playlists Private?Part 2. Bonus: How to Enable Private Session on Spotify?Part 3. How to Download Spotify Playlists and Keep Them Privately on Your Computer?Part 4. Summary
Part 1. How to Make Your Spotify Playlists Private?
As mentioned a while ago, it is possible to privatize your saved playlists on Spotify by simply utilizing the Make Private option. This is designed to hinder all your friends and other users from accessing your collection. If you make your playlist private, even your family will not be able to see your music save, but you do not have to worry as sharing music is still doable. See the steps below on how to make Spotify playlist private.
On Mobile Devices
- Hit the Spotify Music icon in order to open it and then head to your library by selecting the Your Library tab at the bottom.
- Choose the Playlist tab located above and begin choosing the specific playlist that you wish to hide.
- Select the three-dot button next to the playlist title and select the Make private option from the menu list shown.
- A mini window will show up on the screen confirming your choice. Just tap the Make Secret button again in order to confirm your decision.
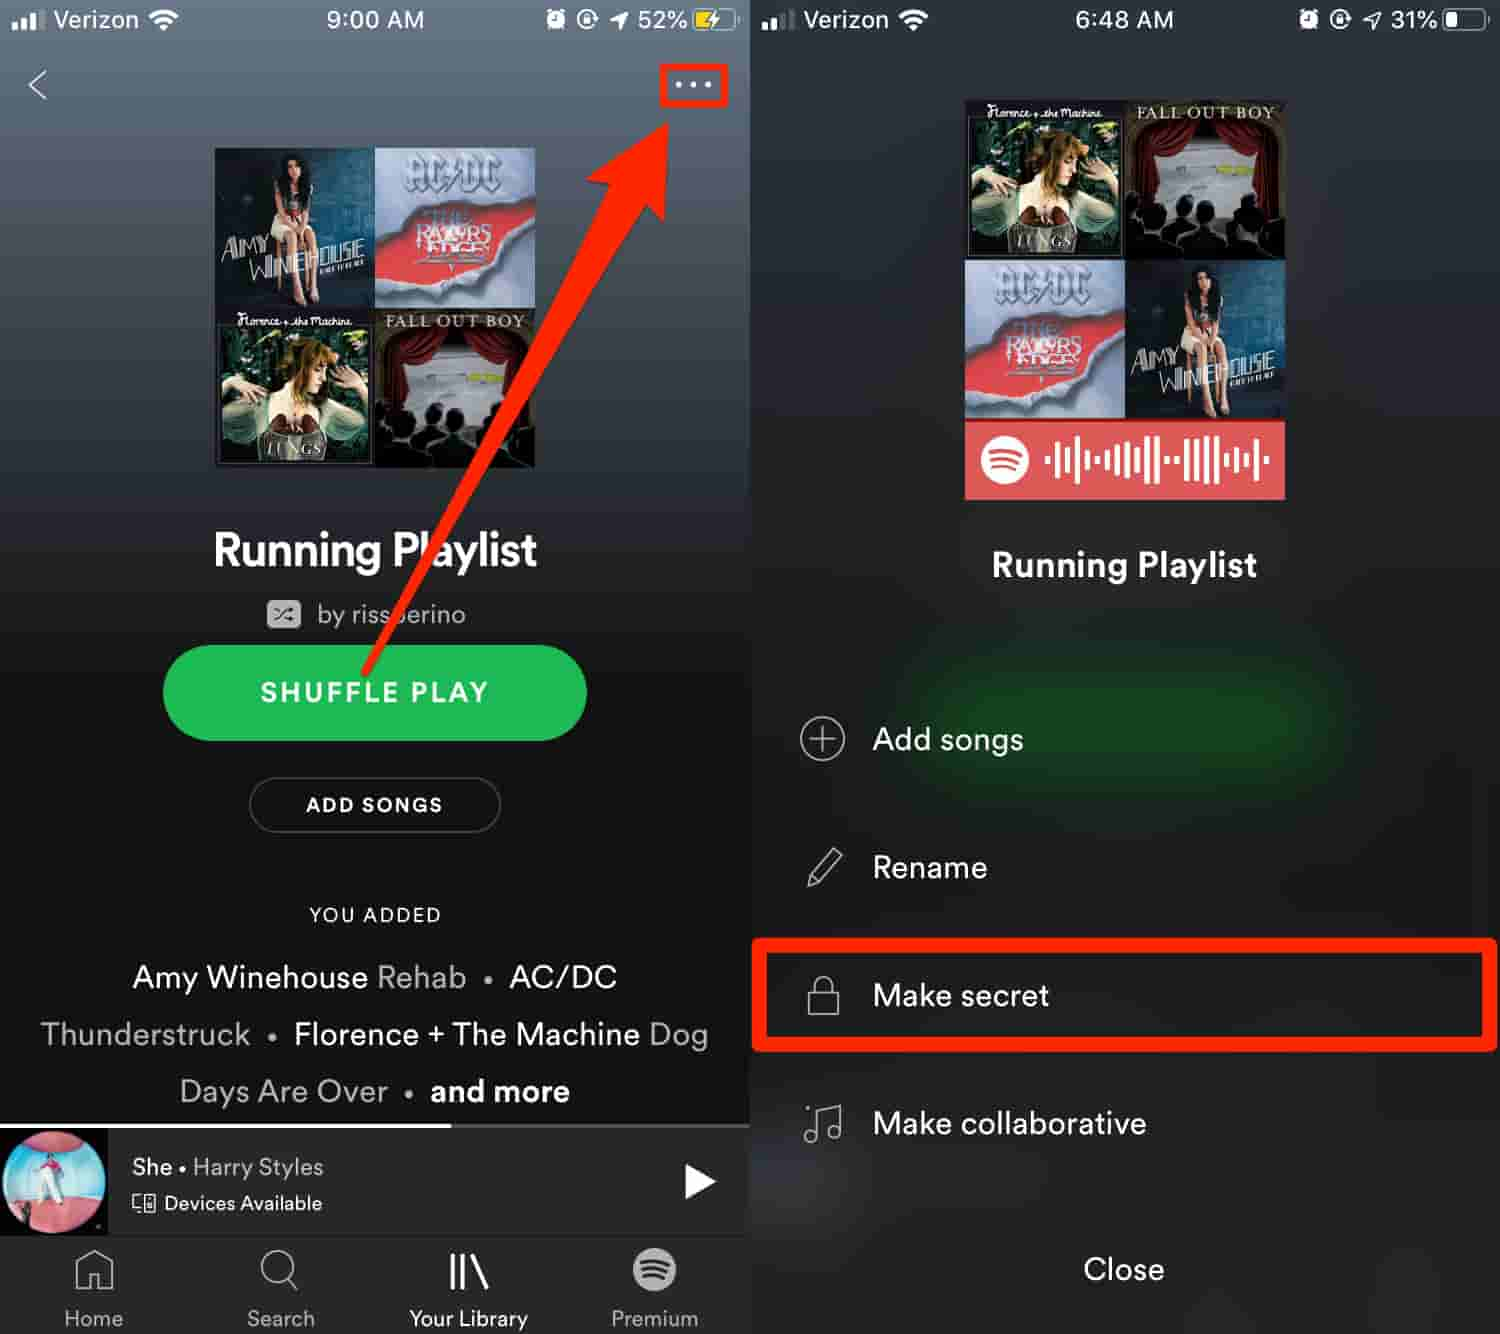
To check if the selected playlist has been really set to private mode, notice if there is a padlock icon next to the title.
On Desktop Computer
For desktop users, you can make Spotify playlist private through the Spotify app for desktop or the Spotify web player. Follow the steps below.
- Launch the Spotify app on your desktop and then go to your library. Alternatively, open your browser and then go to the Spotify web player by simply typing spotify.com. Navigate to the library as well.
- From here, choose the playlist that you wish to privatize.
- Same as above, tap on the three-dot icon to reveal the playlist menu options.
- Select Make Secret option next.
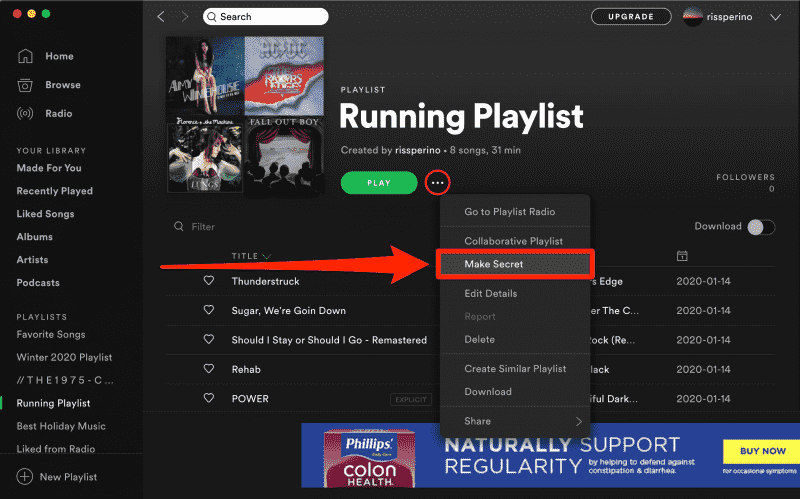
If you had a change of heart and decided to make the playlists public and accessible by others, instead of the option Make Private, click on Make public. This will bring the playlists back to its original setting.
Part 2. Bonus: How to Enable Private Session on Spotify?
Let us say that right after doing the procedure above about how to make Spotify playlist private or after completely hiding them, you suddenly wanted to stream one of these playlists, but still does not want to let others know about that, you may use the Spotify Private session feature. This will tighten the security of your playlists from being leaked to the public.
Here is how to enable Private Session on Spotify.
- Launch the Spotify Music app and click your Profile name above.
- After doing so, tap on Private Session option.
- Wait for a few seconds until it was applied.
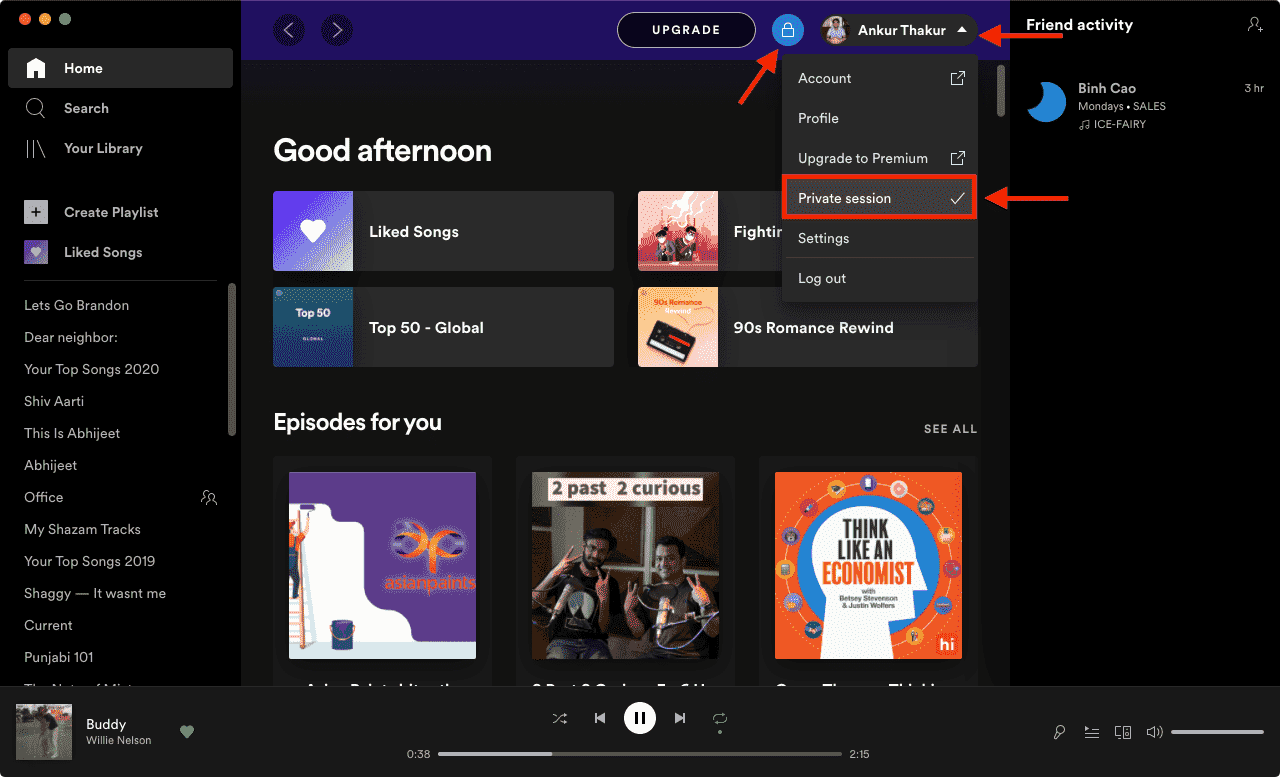
Just to clarify things out, once the playlists were made private, all of your friends won’t be able to see it. But if you did only hide it on your profile via the desktop app, they will still be able to see your playlists. So, the best thing to do in here is to enable the Private Session immediately.
Part 3. How to Download Spotify Playlists and Keep Them Privately on Your Computer?
In addition to the official way to make your playlist private via the Spotify app, you can alternatively have it done by downloading your own permanent copy and keep them in your preferred safe place such as your local computer or hard drive. This only sounds hard, but the actual procedure can be done simply in just a short period of time. All you need is to use the perfect tool that is particularly designed for such purpose.
AMusicSoft Spotify Music Converter is what I could recommend for this kind of procedures. It is specially designed with features of conversion, download and DRM removal, which are all necessary and significant in getting your favorite items from the service. Once you have downloaded the files, you can easily hide them and make Spotify playlist private. Even if you do not upgrade to Spotify Premium, you still can be able to listen to Spotify songs offline.
All of this wouldn’t be possible if AMusicSoft is not capable of making the files encryption free. In AMusicSoft, you can choose from six output formats including MP3, FLAC, WAV, AAC, AC3 and M4A. So you can transfer songs to any device you want! and play them even if Spotify randomly signs you out. More things to add, this tool is designed with a 5x faster working speed which can help a lot in finishing the process in a short span of time. It can also produce the best audio quality of the results which is definitely very good if compared with the original. It can also retain the ID tags and Metadata info of songs even after the conversion process. Lastly, the procedure to do is just simple which you can surely follow easily.
- Through your browser, head to the website of AMusicSoft and download the Spotify Music Converter. This can be done by clicking the Download button. Once download is complete, install the application on your used device.
- Open the music converter to add the items. Just copy the link of the paylists or tracks and then paste it into the converter.
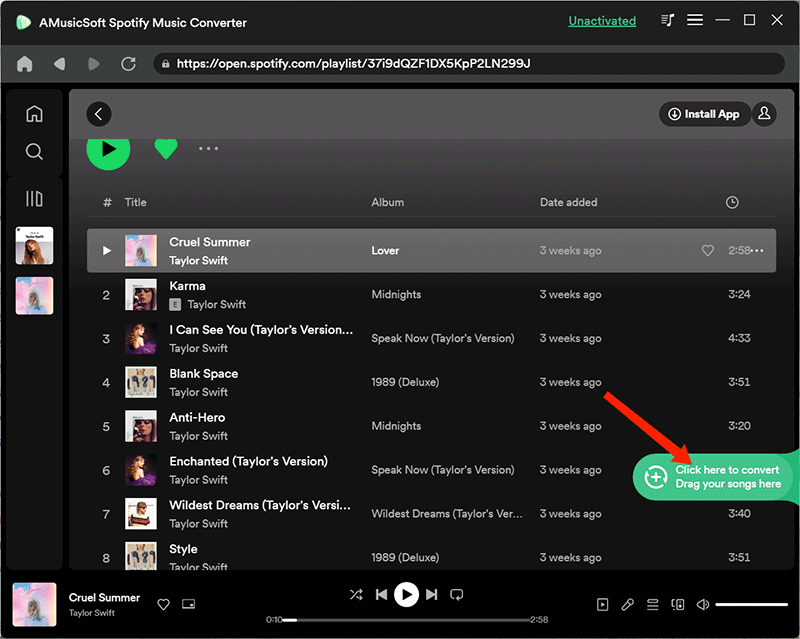
- Next is the format selection. You can choose from MP3, WAV, FLAC, AAC, AC3 and M4A.

- Tap the Convert button and get the process started.
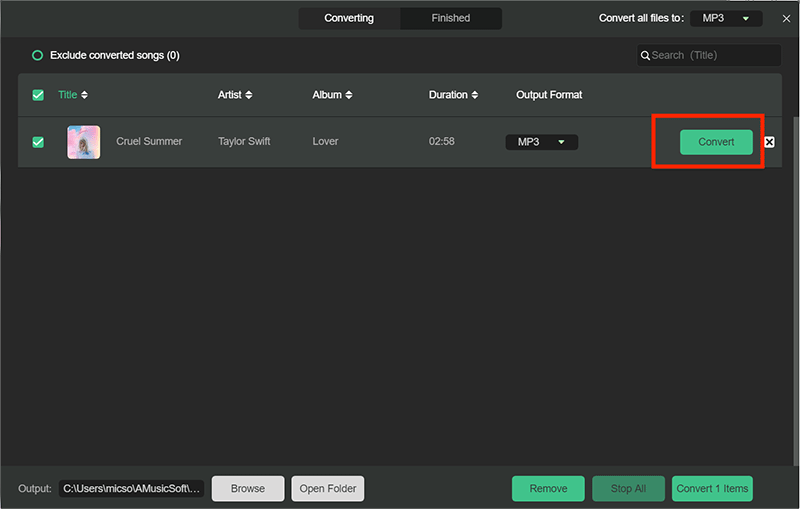
- Save the results on your computer by downloading them from the Converted section.
Part 4. Summary
In order to make Spotify playlist private, there are some procedures that you must follow. Though the devices are different, the steps to follow are quite the same. So, with a full understanding of the guide shared above, you can surely make your playlist private in the fastest time possible. Talking about keeping them hidden forever on your own computer, you can use AMusicSoft Spotify Music Converter. This tool is definitely a big help to get the copy of your desired Spotify files.
People Also Read
- How To Download Music For PowerPoint From Spotify?
- How Spotify Family Add New Member?
- How To Make Spotify Stop Playing Suggested Songs
- How To Get 30 Minutes Ad Free Spotify
- Latest Ways To Use Spotify djay Pro App And Add Music To It
- Multiple Ways To Get Spotify On VIZIO TV: A Guide
- Djay App Spotify: Things That You Have To Know
- All About Rythm Bot Spotify: How To Play Music On Rythm Bot
 About The Author
Robert Fabry is an ardent blogger, and an enthusiast who is keen about technology, and maybe he can contaminate you by sharing some tips. He also has a passion for music and has written for AMusicSoft on these subjects.