How To Add Music To Spotify (Local Files Upload Guide)
Spotify is one of the top music streaming platforms, giving us instant access to listen to our favorite tunes, podcasts, as well as radio. But what if you can’t find the song that you like, is there a way to add local music to Spotify?
Although Spotify offers a wide collection of music, there is also a possibility that you can’t find the song that you want maybe because of copyright issues or restrictions but you don’t have to worry because we will guide you on how to add music to Spotify in this post. So, without further ado, let’s begin.
Contents Guide Part 1. Add Your Own Music to Spotify (Desktop)Part 2. Add Your Own Music to Spotify (iOS & Android)Part 3. Bonus: Download Spotify Songs as Local Files Without PremiumPart 4. Conclusion
Part 1. Add Your Own Music to Spotify (Desktop)
Uploading your own music to Spotify is very straightforward, and available to both Spotify Free and Premium users. If the local music files are all stored on your computer, you can follow this part to finish the process. Note that you'll need to use the Spotify desktop app for Windows or Mac, rather than the web player. Here's how to add music to Spotify on your computer:
Step 1. Open your Spotify desktop app, click your profile icon in the top right corner, and select Settings.
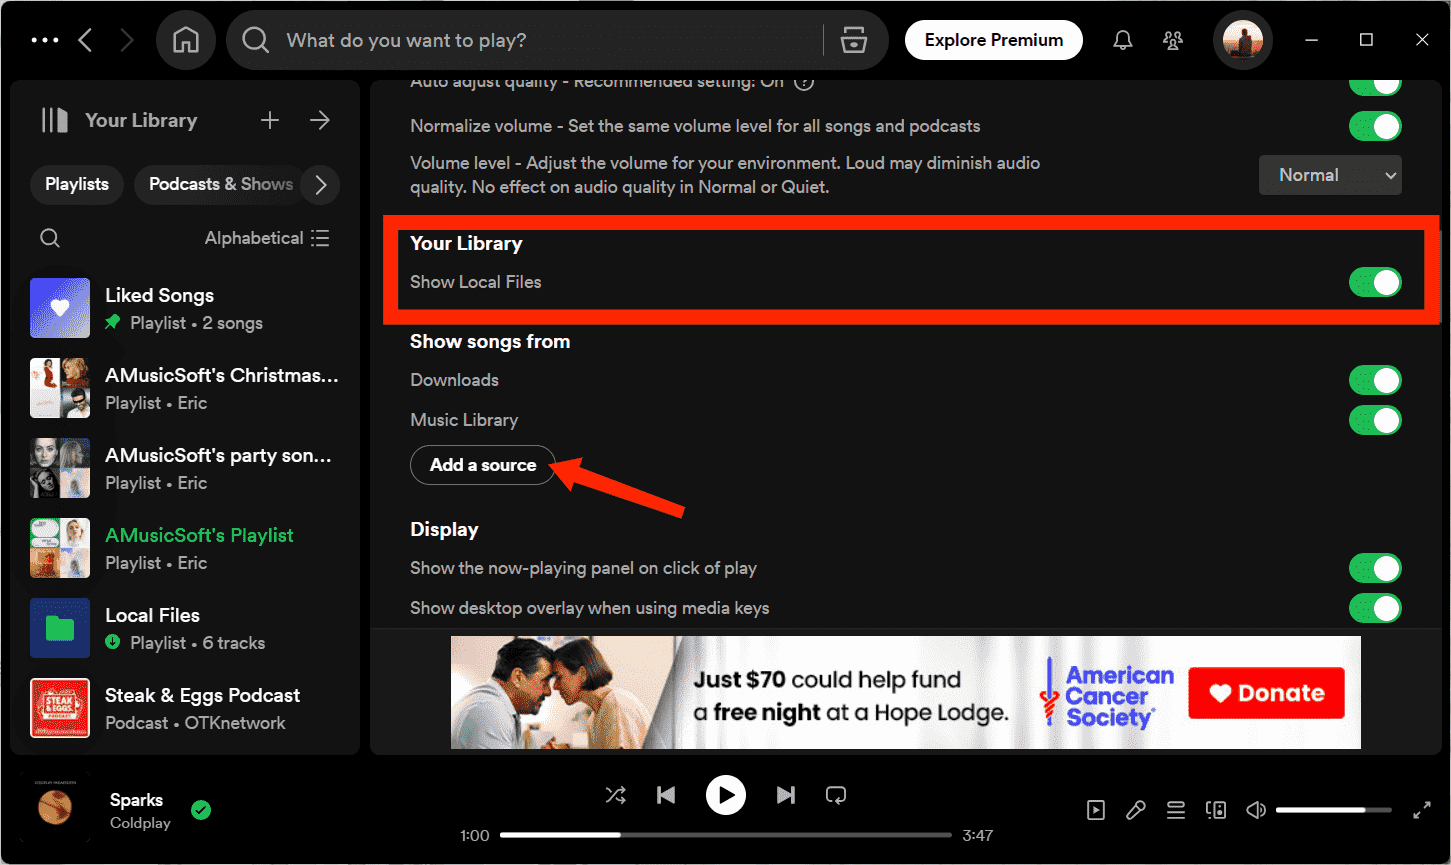
Step 2. Scroll down to Library. Once you're here, make sure to switch on Show Local Files.
Step 3. In the same section, Spotify will suggest folders from which you can add the files (usually Downloads and Music library). If you want to import audio files from another folder, select Add a source.
Step 4. How to add music to Spotify? In the pop-out, find the folder containing your local music files. Click OK.
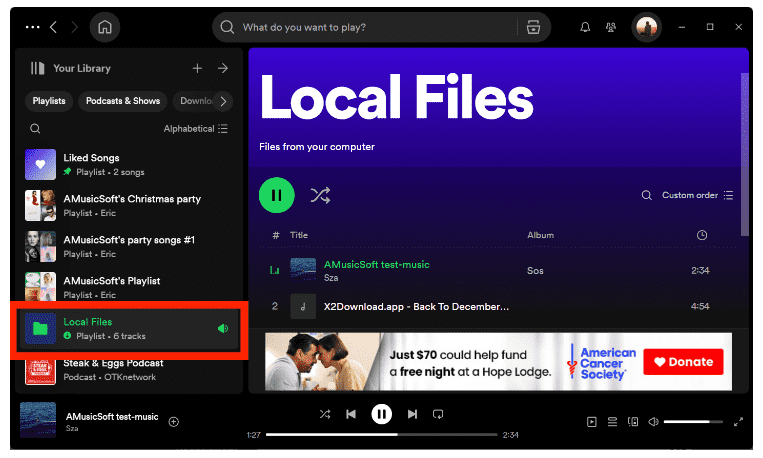
Step 5. Go to the homepage and click Your Library on the left menu. You'll find the Local Files folder there.
Part 2. Add Your Own Music to Spotify (iOS & Android)
Can you upload local files to Spotify using a mobile device? Yes, you can sync local files to mobile phones after inserting them into the desktop app using your computer. Additionally, Spotify also allows you to upload audio to the Spotify folder on your device directly. In this part, we will share these two methods with you! To add local music from your iOS or Android device, follow the steps below.
Method 1. Sync Local Files to the Spotify Mobile App
How to add music to Spotify on iOS and Android? Once you have added the local music files to the Spotify desktop app by following the steps outlined in the previous section, follow these steps to sync them to your smartphone or tablet:
Step 1. Open the Spotify app on iOS and Android. Swipe left or tap your profile picture. Tap settings and privacy.
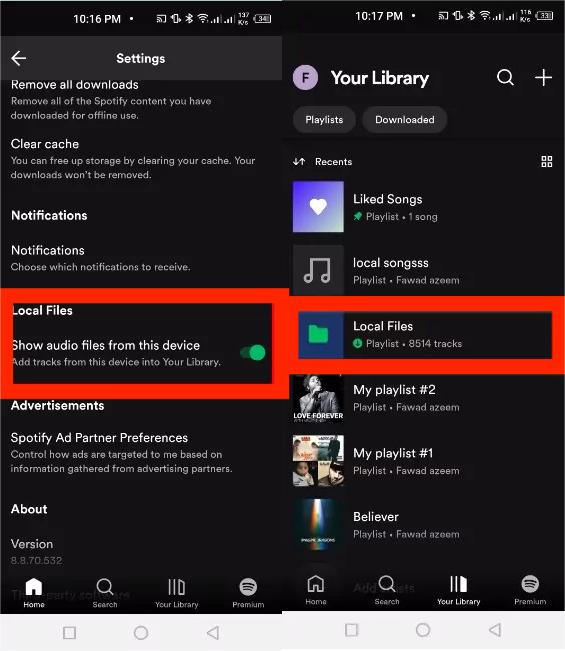
Step 2. Scroll down, find Show audio files from this device under Local Files, and turn it on.
Step 3. Spotify will automatically look for local files from your smartphone or tablet. Go to Your Library. The Local Files folder should now appear in Playlists.
Method 2. Copy/Move Local Files from Other Apps to Spotify
On iOS
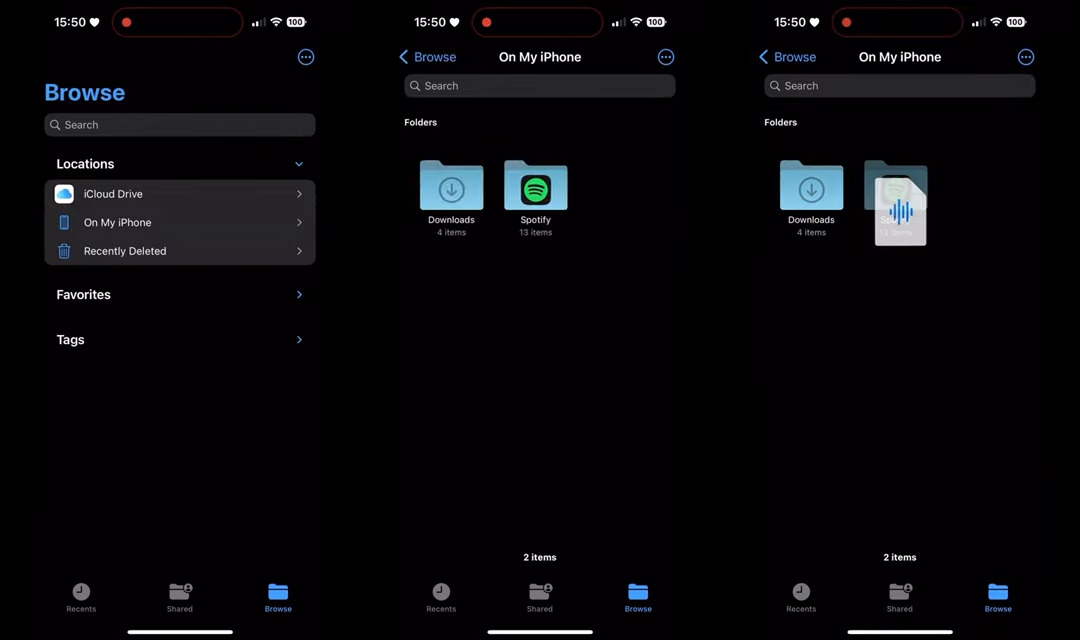
On your iOS device, Spotify will automatically look for local files from the folder called "On My iPhone." You can copy them to the Spotify folder if the local files are all stored in other locations or apps, such as iCloud Drive.
Step 1. Open the Files app on iOS, and tap the folder of the browser/storage app.
Step 2. Select the music file and choose Copy or Move.
Step 3. Tap Browse and go to the folder On My iPhone. Click and press the folder for Spotify. Select Paste or Move Item here. Your stored music is now in Local Files.
On Android
How to add music to Spotify on Android? To add local music from other apps to Spotify, follow the steps below.
Step 1. Open the app that can browse and manage the file, such as Google's Drive app.
Step 2. Find the option to Download the file.
Part 3. Bonus: Download Spotify Songs as Local Files Without Premium
Now we know how to add music to Spotify. So, is it possible to download Spotify music as local files? Of course, an active Spotify Premium subscription allows you to download music for offline playing. However, the downloads are stored in Spotify's cache folder only and can't be moved to other devices for playing due to DRM protection.
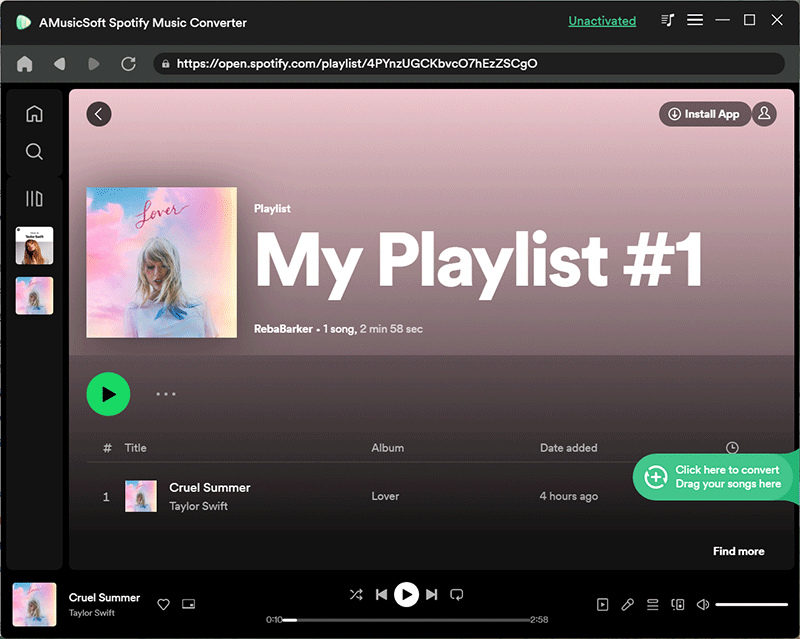
Here we offer you a great way to download local files from Spotify for playing anywhere. Ever wonder if you can listen to Spotify even without a Premium account? Well, the answer is you absolutely can! There is this professional tool that can make it possible and this is none other than AMusicSoft Spotify Music Converter.
Once you cancel the premium subscription, you will lose access to all offline or downloaded songs. AMusicSoft Spotify Music Converter can remove the DRM protection from each Spotify song. Once the DRM is removed you can play Spotify songs as much as you want on any device and can even keep it forever without worrying about your monthly subscription. Even if you do not upgrade to Spotify Premium, you still can be able to listen to Spotify songs offline.
Another feature that is worth mentioning is that it can convert the songs to any format that you like, especially if the device that you are using requires a specific format like FLAC, M4A, WAV, or MP3. If you are thinking about the song quality would be affected then you don’t have to worry because this program maintains the quality of the songs as it is the original ones. It also keeps the ID3 tags and metadata of each track which will make it easier for you to organize your playlist after conversion.
Step 1. Once installed you have to open the tool and then look for the option to add the songs that you wanted to convert. It is also the time that you have to preselect the songs you love.
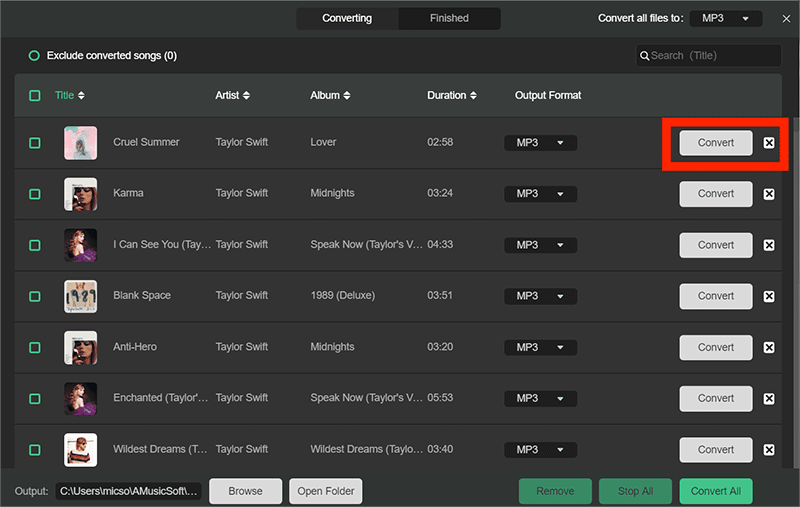
Step 2. Now, simply select the output format, set the bit rate and sample rate, as well as the conversion speed according to your requirements.

Step 3. And the third one is to finally choose the Convert button, the professional converter will then start to convert all the songs that you have chosen to be converted as soon as possible since the tool converts really fast.
Part 4. Conclusion
Now you’ve learned how to add music to Spotify on your desktop and mobile app. By combining new tunes uploaded on Spotify every day and your own local songs, you can create the most personalized playlists ever. If you want to download music from Spotify as local files, don’t miss the AMusicSoft Spotify Music Converter! With AMusicSoft, you have the ability to get all your favorite songs, playlists, and albums from Spotify to your local computer. Then, you can easily transfer them to other apps or devices for offline playback without any limit.
People Also Read
- Learn How to Play Spotify on Xbox One Here
- A Guide on How to Play Spotify on PS4
- Play Spotify Music On Samsung Gear S3: Can I Do It?
- How To Download Podcasts On Spotify On Mobile/Desktop
- Top 4 Spotify Playlist Downloader Online For Windows And Mac
- Stream Spotify Music to Harman Kardon Speaker
- Transfer Spotify Music to Eclipse Fit Clip MP3 Player
- Ways on How to import Spotify playlist to Google Music
 About The Author
Robert Fabry is an ardent blogger, and an enthusiast who is keen about technology, and maybe he can contaminate you by sharing some tips. He also has a passion for music and has written for AMusicSoft on these subjects.